Mobirise

IQAROS - INSTRUCTIONS

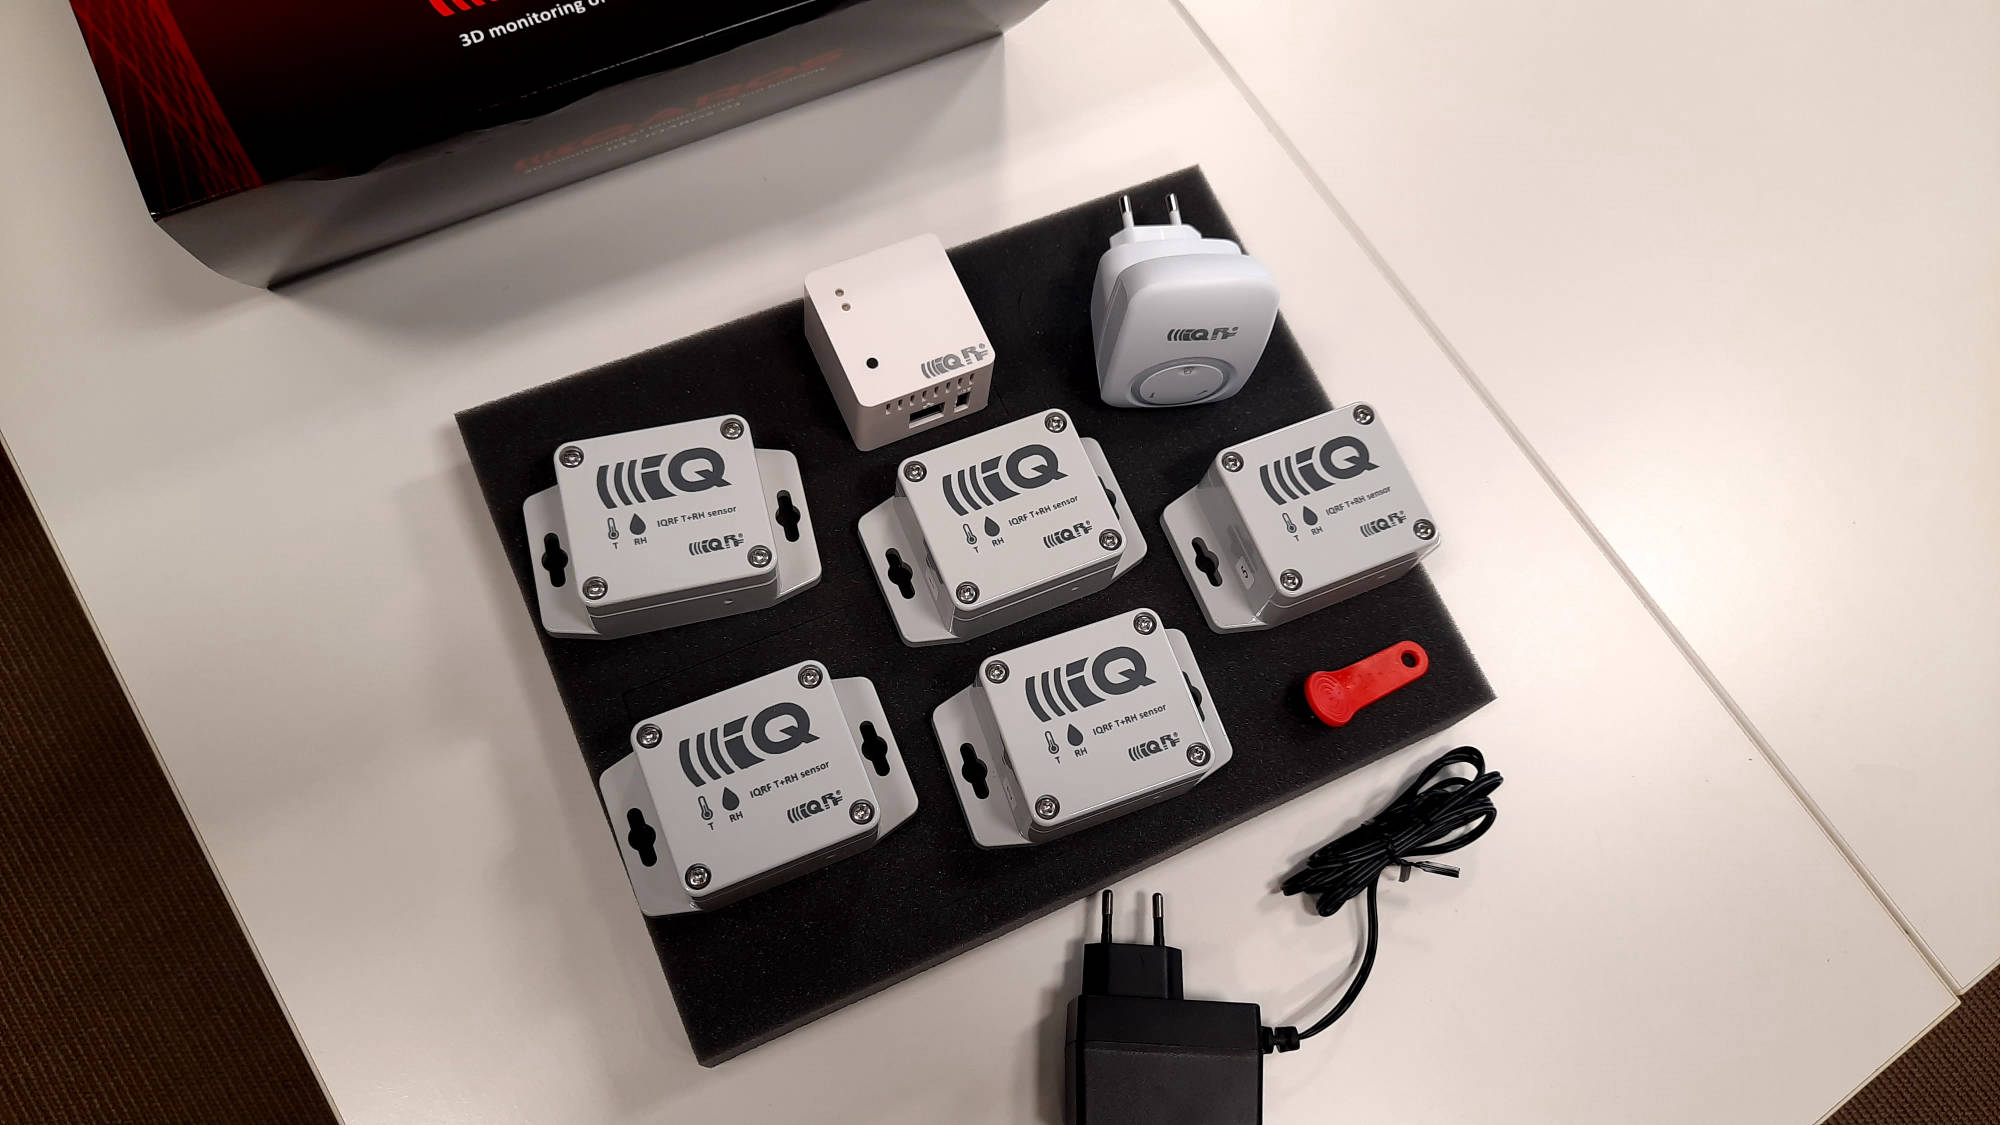
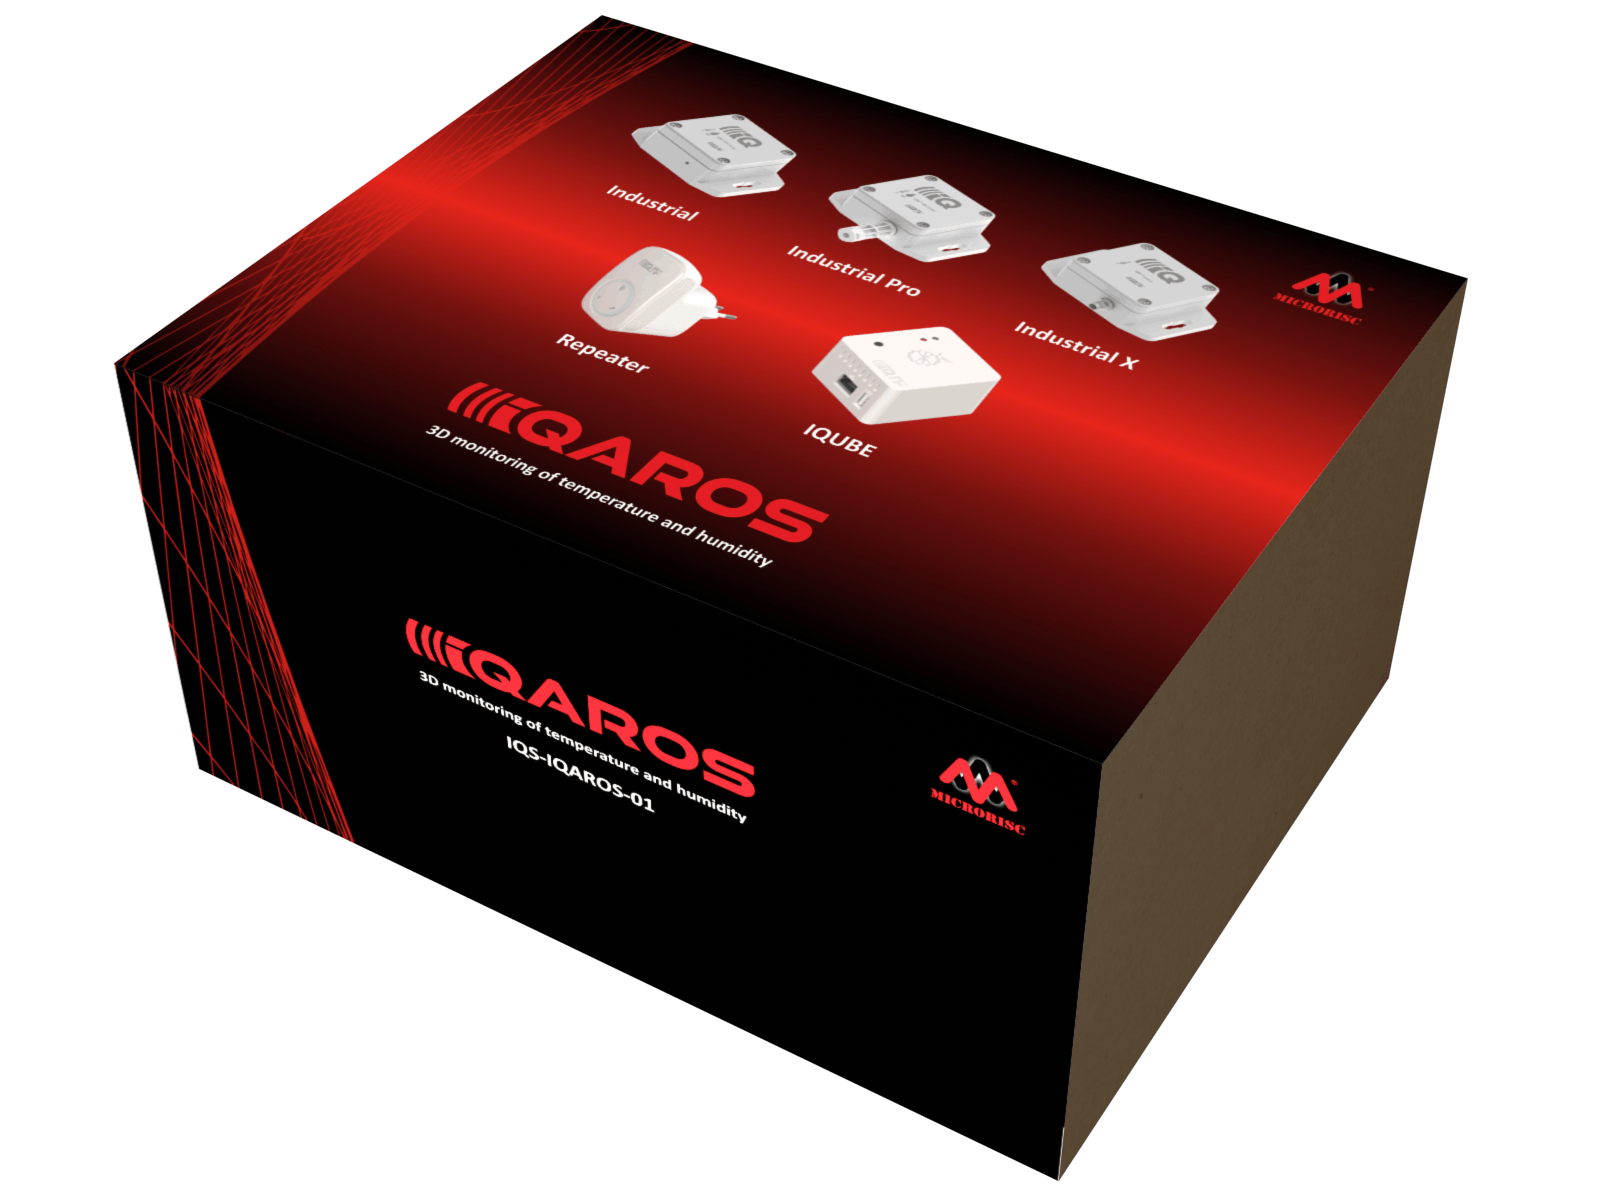
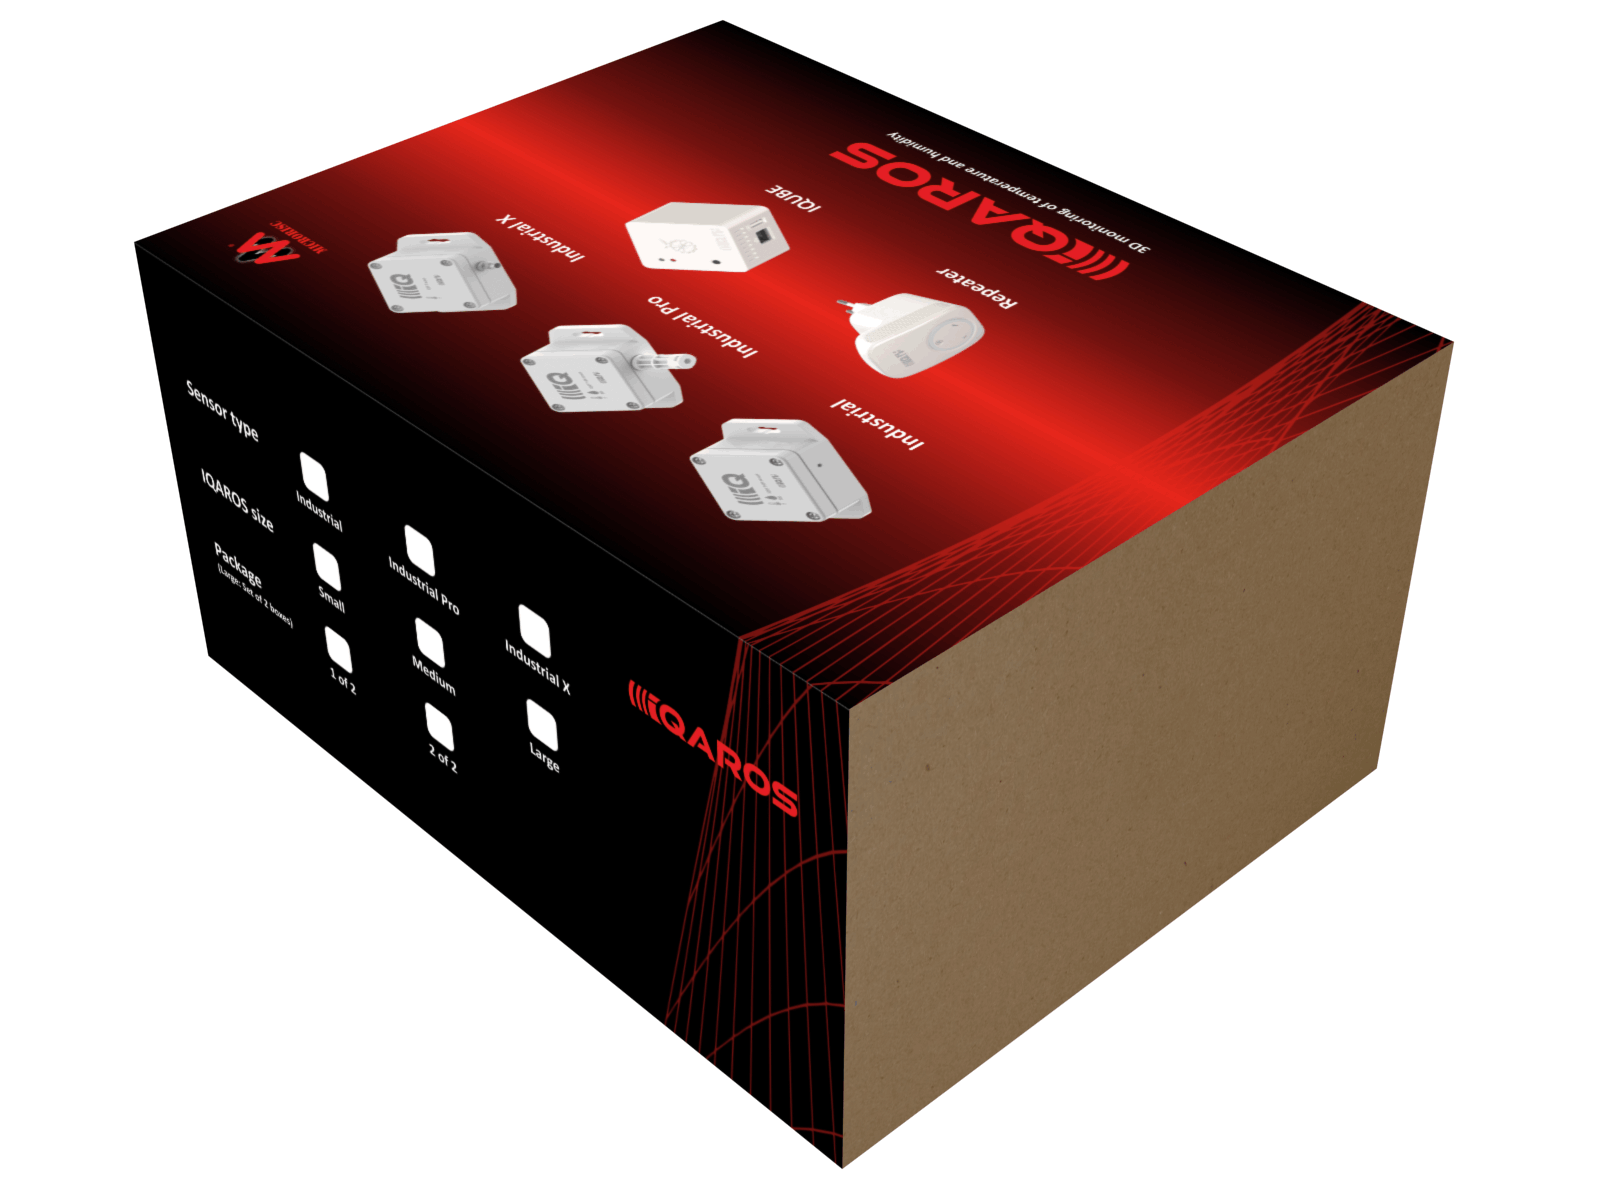
In the set, you will find an IQUBE gateway, sensors according to the purchased set and one or more repeaters.
After unpacking the purchased kit, first place all devices, connect to the gateway via a web browser, perform a network installation, and set the necessary system parameters.

Video tutorial - demonstration of system installation and setup

News - June 2022

See the news in installation and settings that have occurred in the new version (since June 2022)

  • Creating of the main user who will be able to set the parameters of the set.
  • The RSSI values represent the best signal strength of the sensors from the transmission infrastructure.
  • In the Advanced menu, you can set a static IP address, SMTP parameters, or remote access using the Mender service.
  • You can change your password.
  • If you have forgotten your password, there is a procedure for resetting it.

Devices placement

1

Repeaters

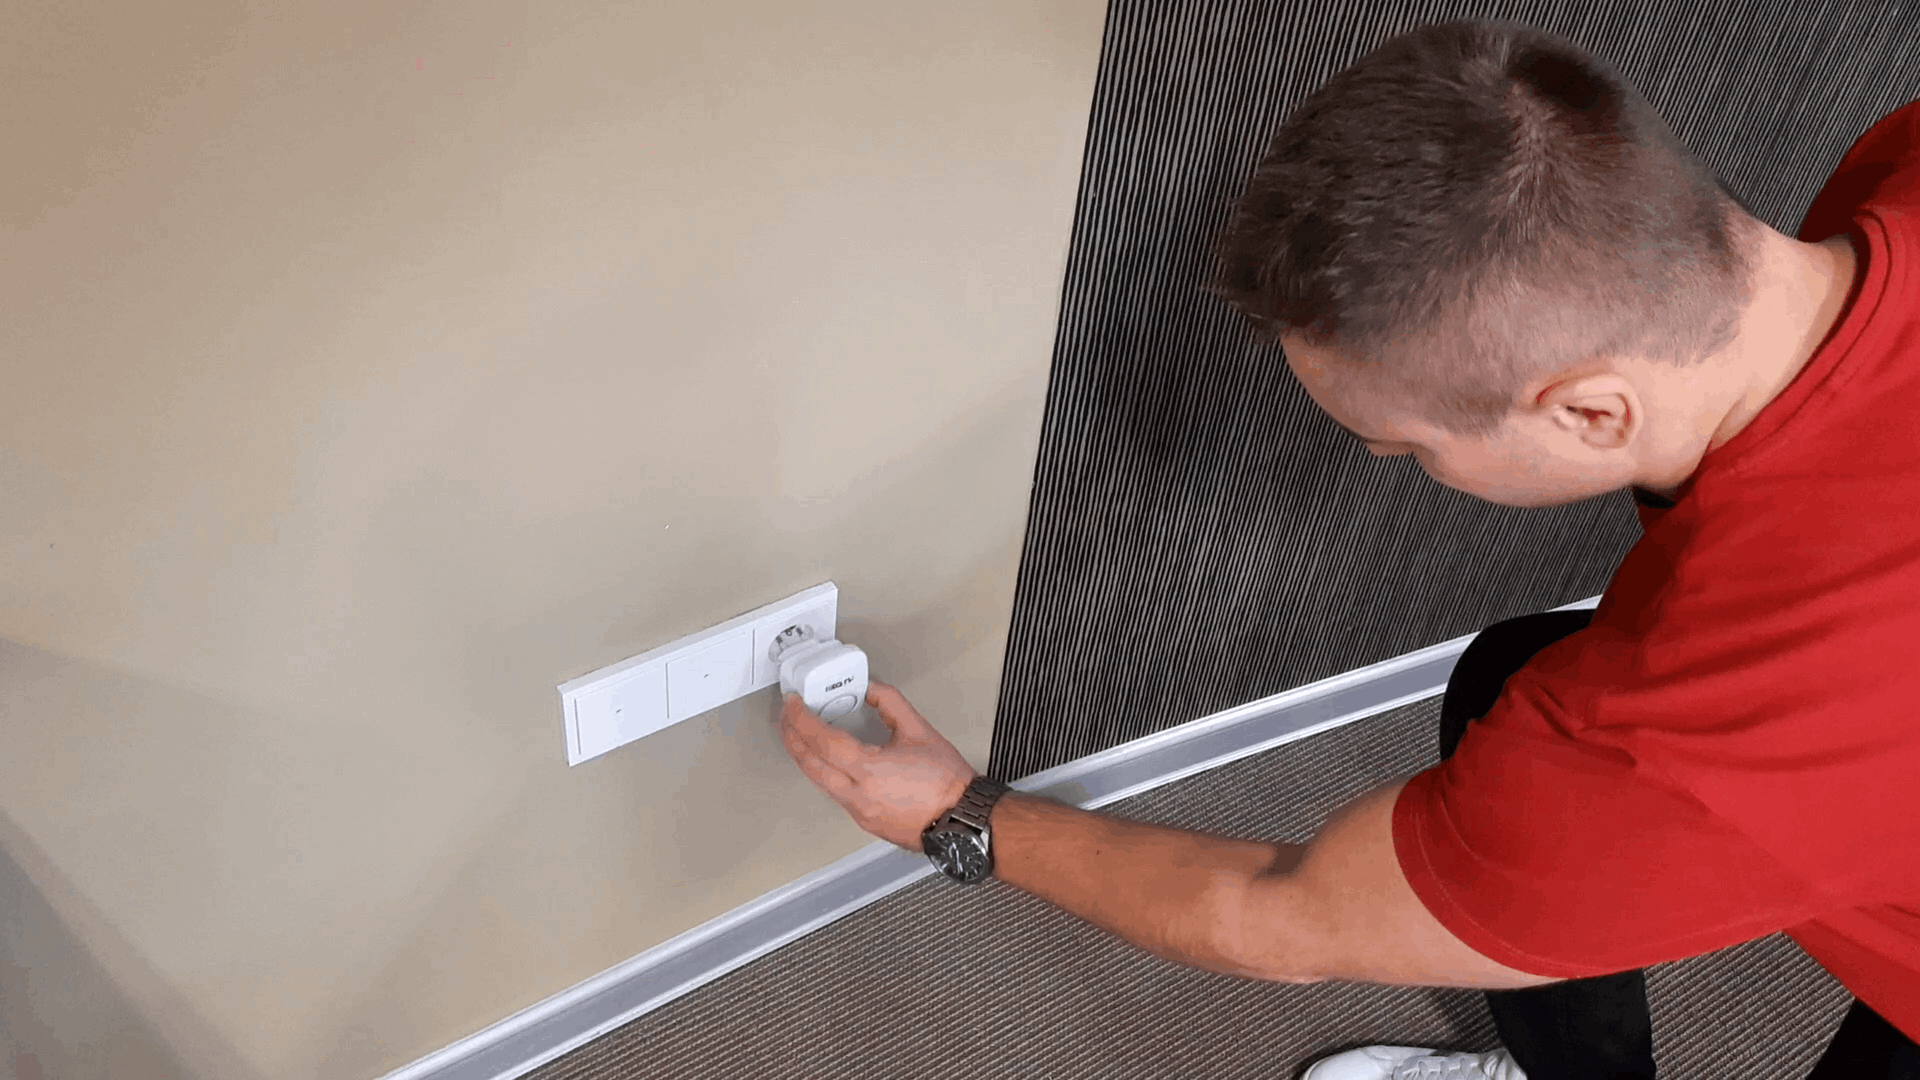
Deploy the repeaters and plug them in.
Each repeater must be within range of the sensors from which it collects data and, to ensure wireless communication, also within range of the IQUBE gateway or other repeater. The environment in which you install the device affects the range.

2

Sensors

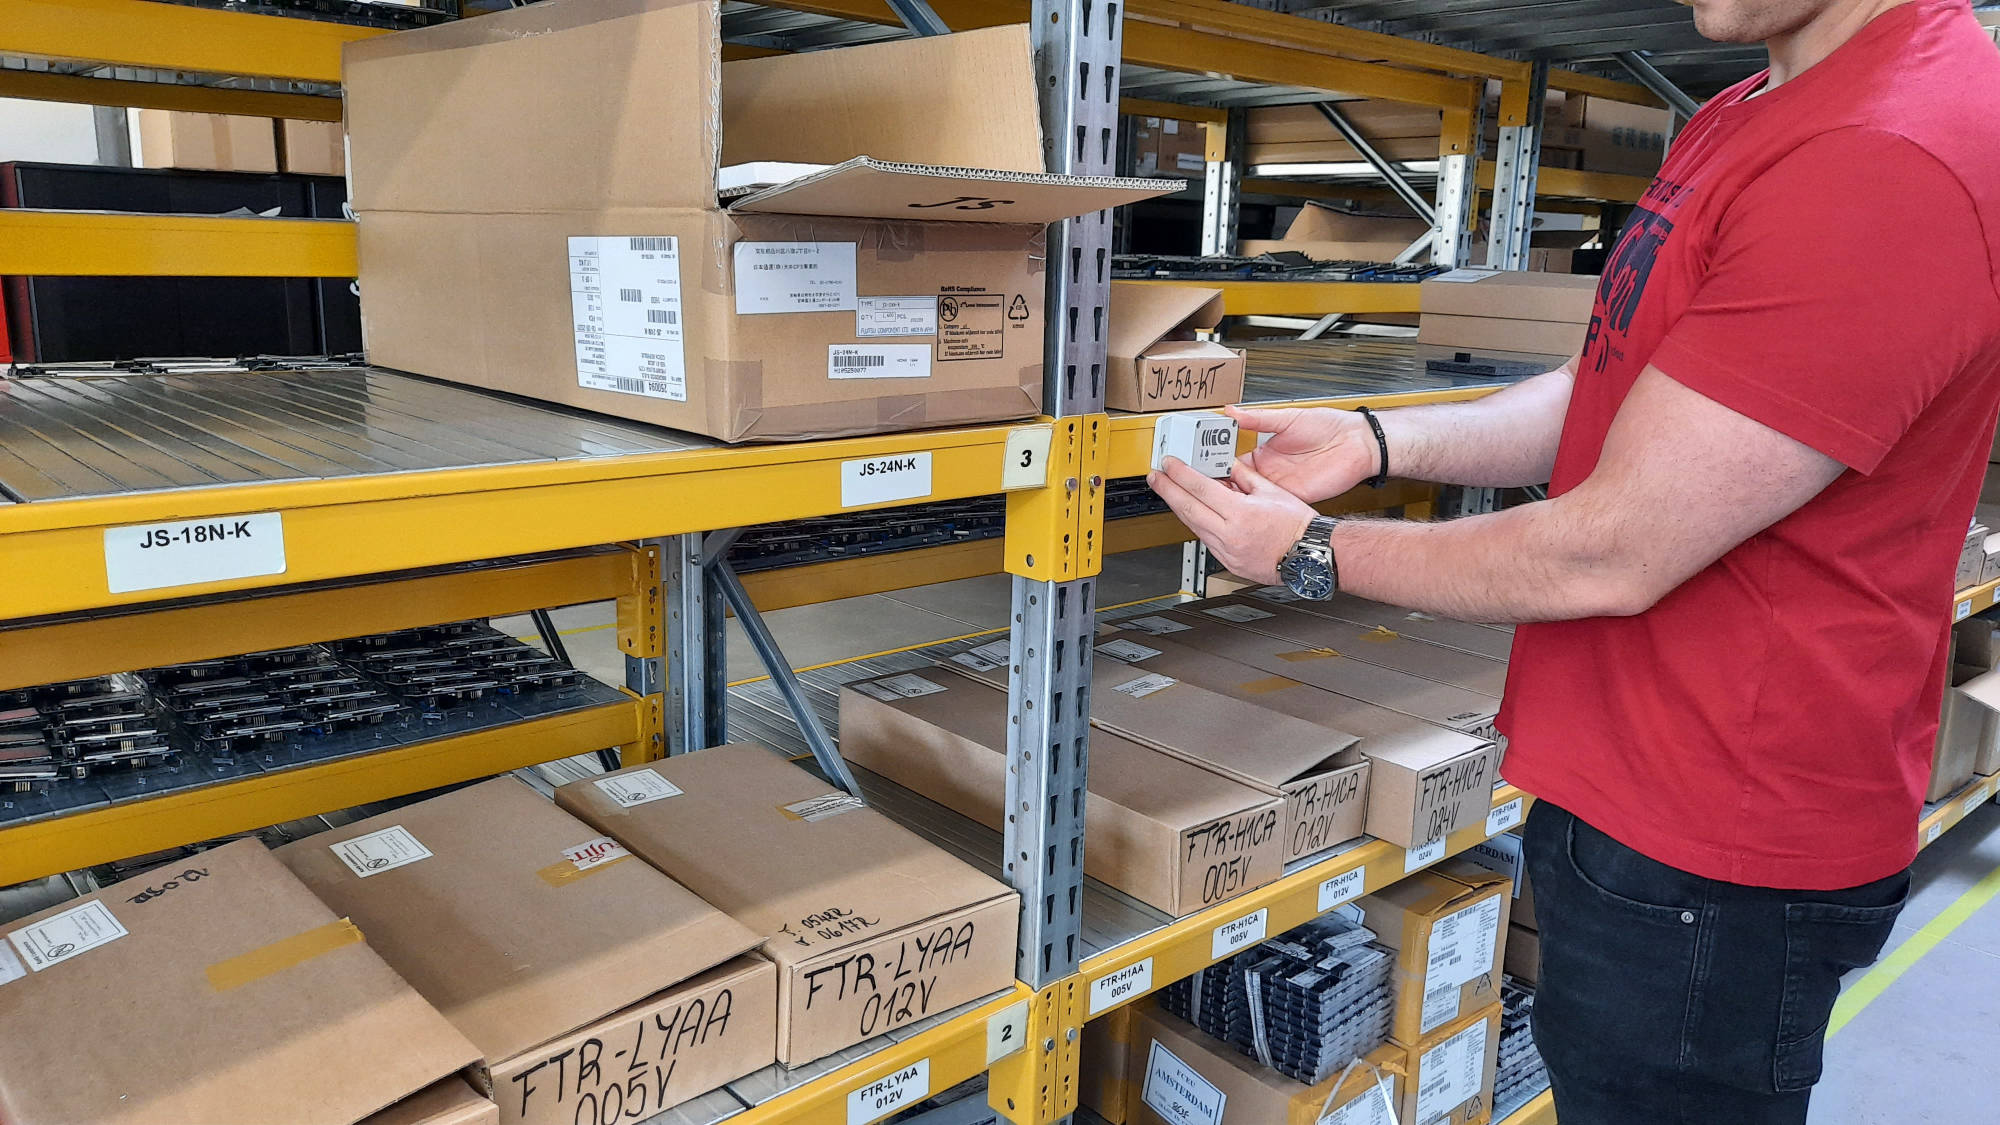
Place the sensors in the monitored places. You can screw them on or stick them with double-sided adhesive tape. Mount the sensor in a vertical position (for proper antenna orientation) so that the IQRF logo is normally readable. During deployment, you can activate the sensors directly and verify the range (see point 4).

3

IQUBE gateway

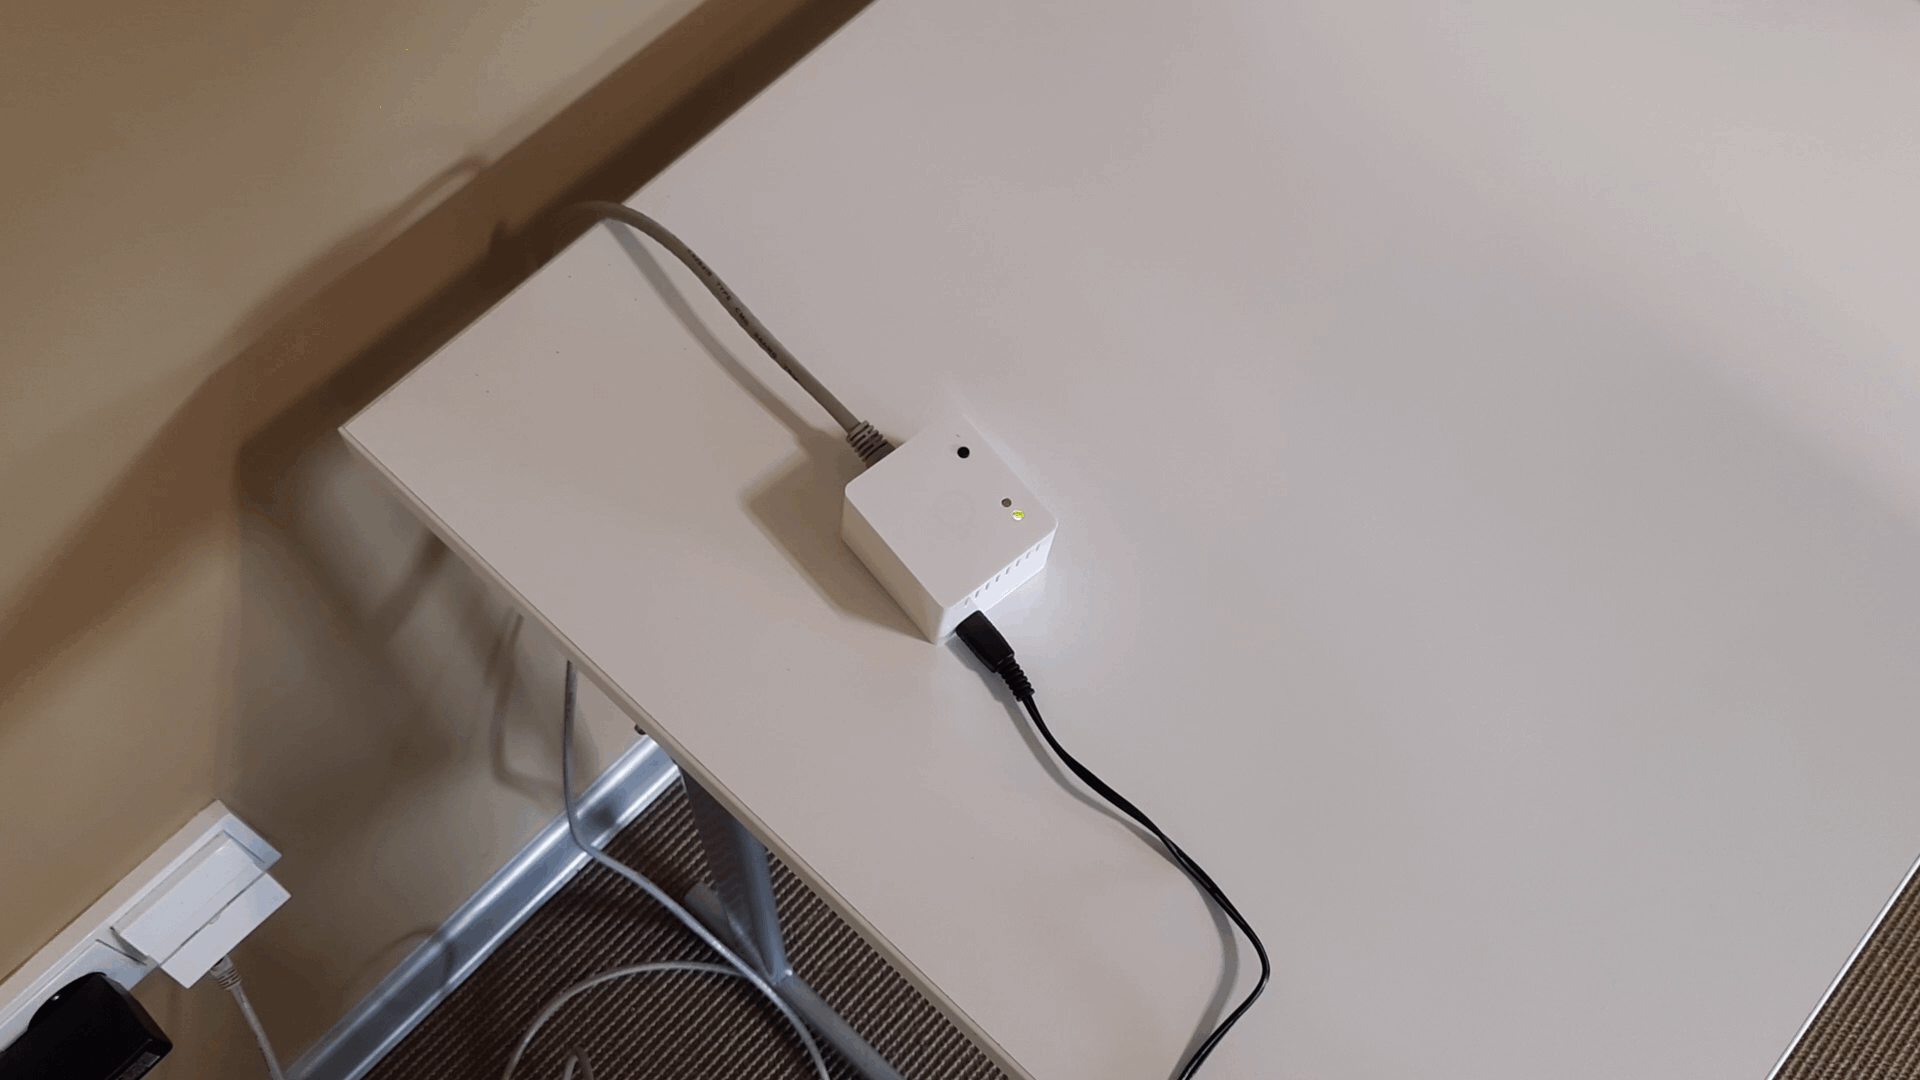
Connect the IQUBE gateway to the local computer network with an Ethernet cable and to the mains with the enclosed adapter.
Only the power adapter supplied with the device must be used!
You will connect to the gateway from a device on the same network using the alias or IP address it received on the network.

4

Activation and verification of sensors

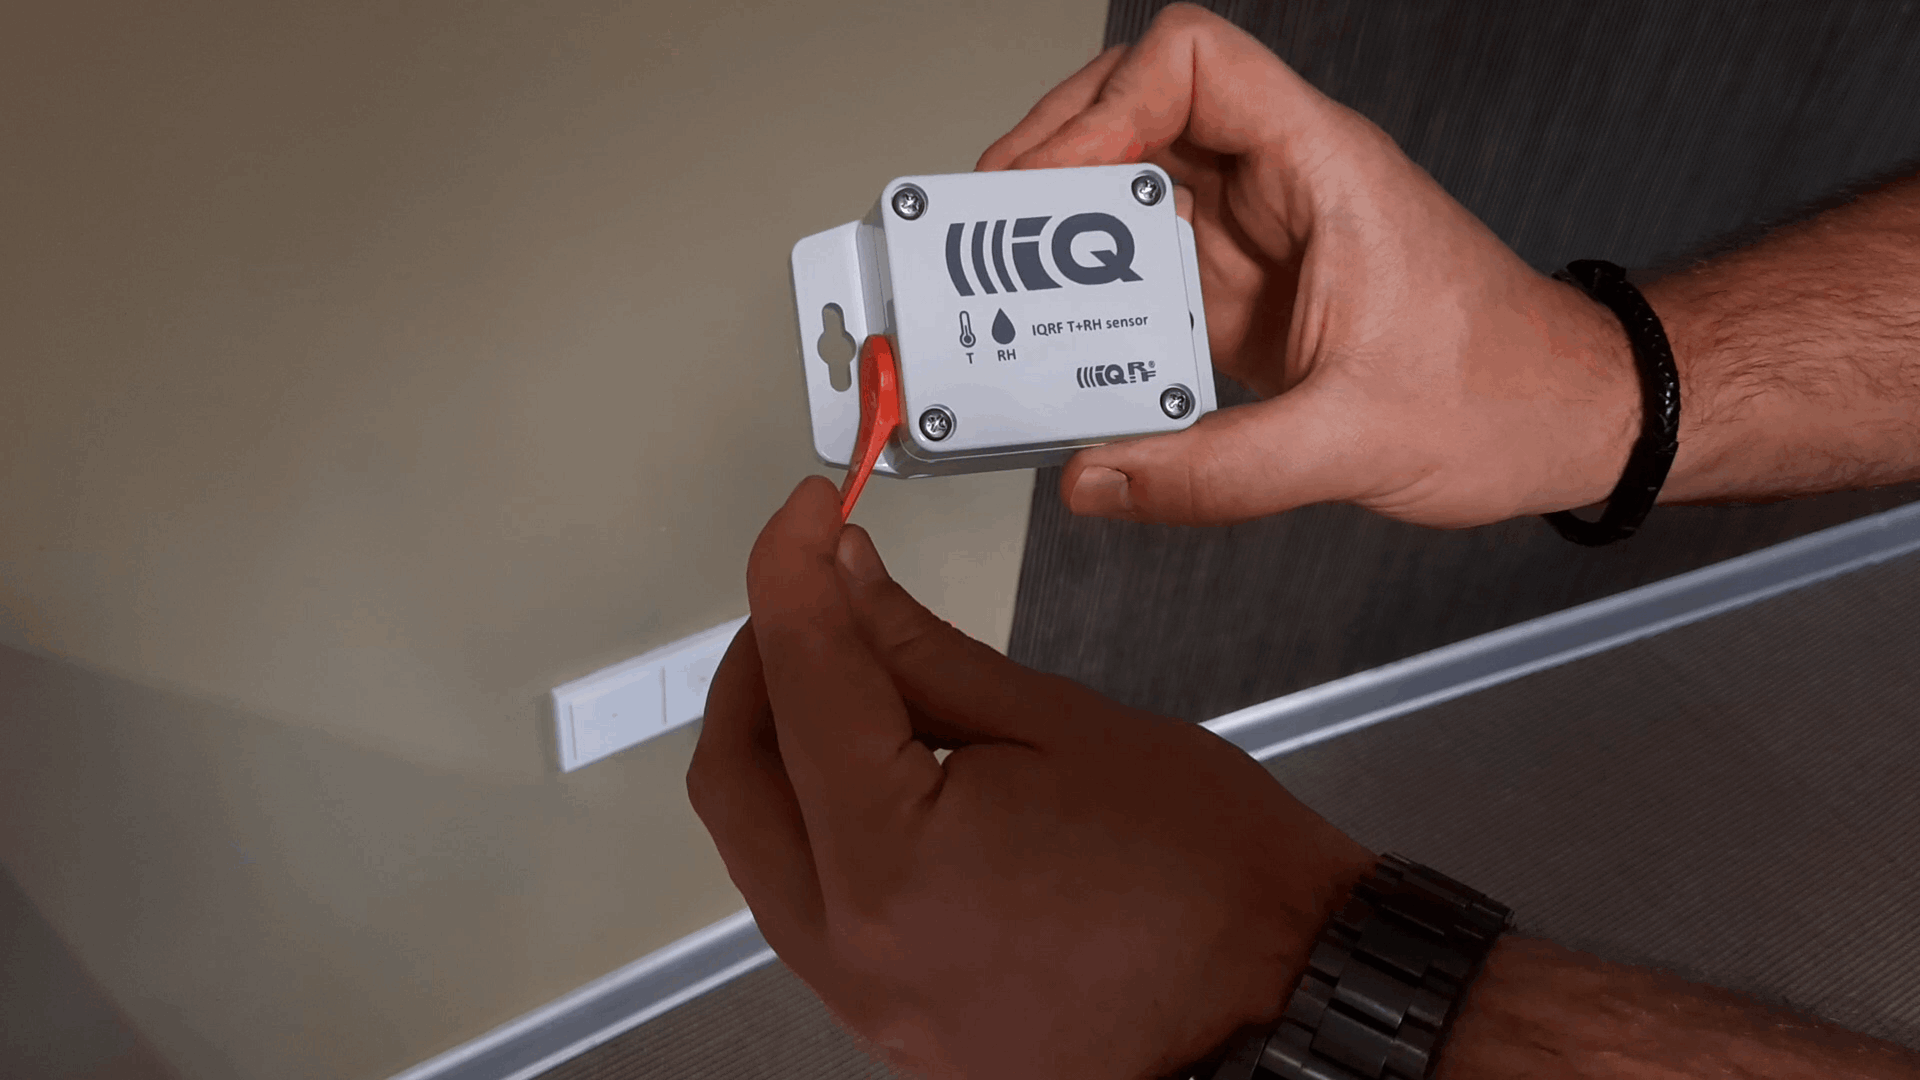
Sensor activation: Place the magnet on the left side of the sensor (near the sensor number label) for approx. 1 second. The sensor beeps once.
Range verification: To find out that the sensors are within range of the communication infrastructure, place a magnet on the left side of the sensor (near the sensor number label) for 1 second, wait for the first beep (the sensor is active) and then move the magnet away. If the sensor beeps a second time, it means that an acknowledgment has been sent from the infrastructure and the range test is successful.
If the sensor does not beep a second time, it is necessary to check the correct orientation of the sensor (antenna) or change the mutual arrangement of devices.

Connection to the gateway

  • Once the gateway starts, connect to it from a computer on the same local computer network. Launch a web browser on your computer and enter the address http://iqaros.
  • If the use of the iqaros alias does not work (there may be several reasons - eg you do not have the necessary network protocols enabled on the network, you have a segmented network or you have more IQAROS systems in the network), enter the IP address that the gateway received from your DHCP instead of "iqaros" server (format http://IP_address).
  • To find the IP address, enter the address https://install.iqaros.eu/ in a web browser, and enter your gateway number here. You can find this on the label at the bottom of the gateway or you can use the QR code reader application on your mobile phone, read the code in this way from the gateway, and get redirected directly to the specified address on the mobile phone.
  • You can also use some common network tools (eg FING, IP Scanner, etc.). You can then access the IP address of the gateway only from the same local network unless you have done redirection in the network otherwise.
  • Warning: Do not unplug the IQUBE gateway without first switching it off. To switch it off, press the button on it. Press and hold the button until the red LED on the gateway flashes twice. Then wait half a minute for the shutdown process to complete.

IQAROS network installation

  • If you are the first user of the IQAROS system, you will need to create a main user to set the parameters (see News 06/22). If you forget your password, you can go through the procedure to recover it. It is also possible to reset the IQUBE gateway to factory settings.
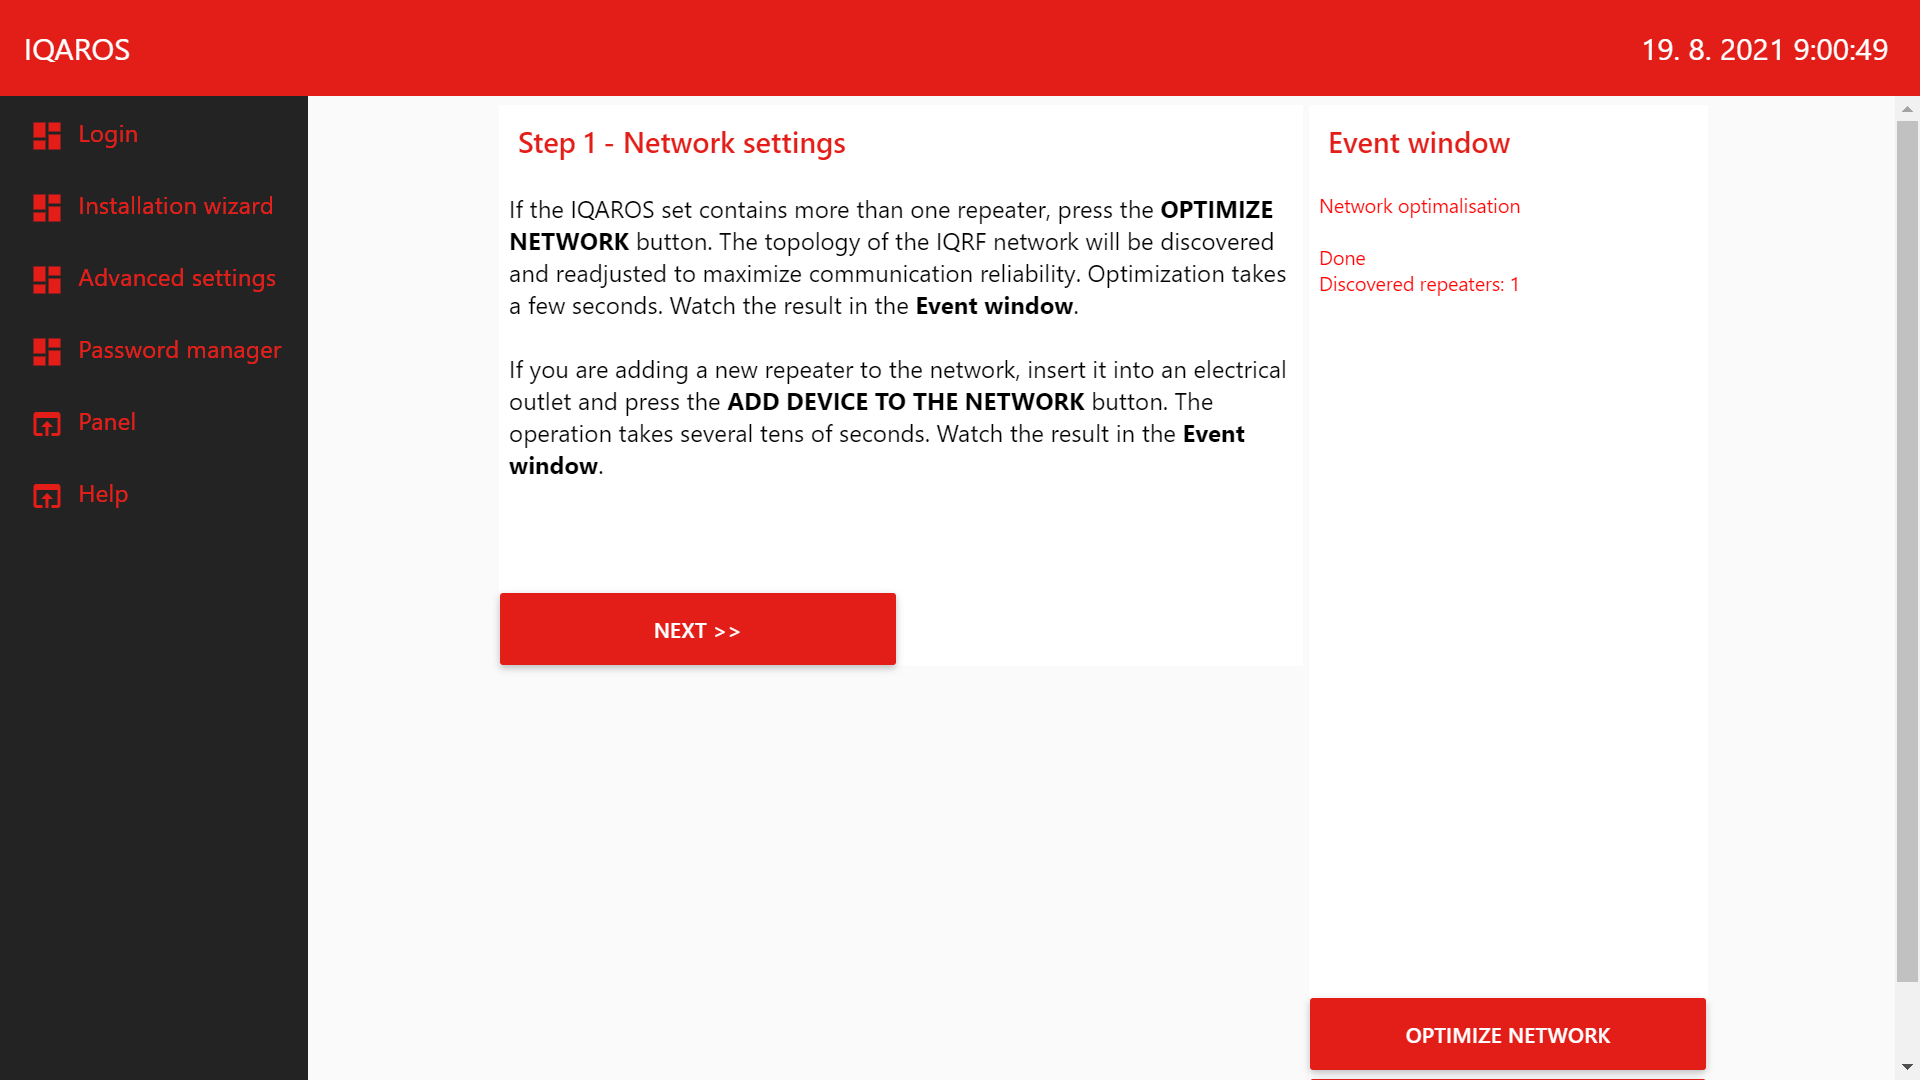
  • Follow the wizard, it will start automatically or it will start manually.
  • If the IQAROS set contains more than one repeater, perform network optimization (press the Optimize network button in the wizard). The topology of the IQRF network will be discovered and reconfigured to maximize communication reliability. Optimization takes a few seconds. If the system contains only one repeater, no optimization is required.
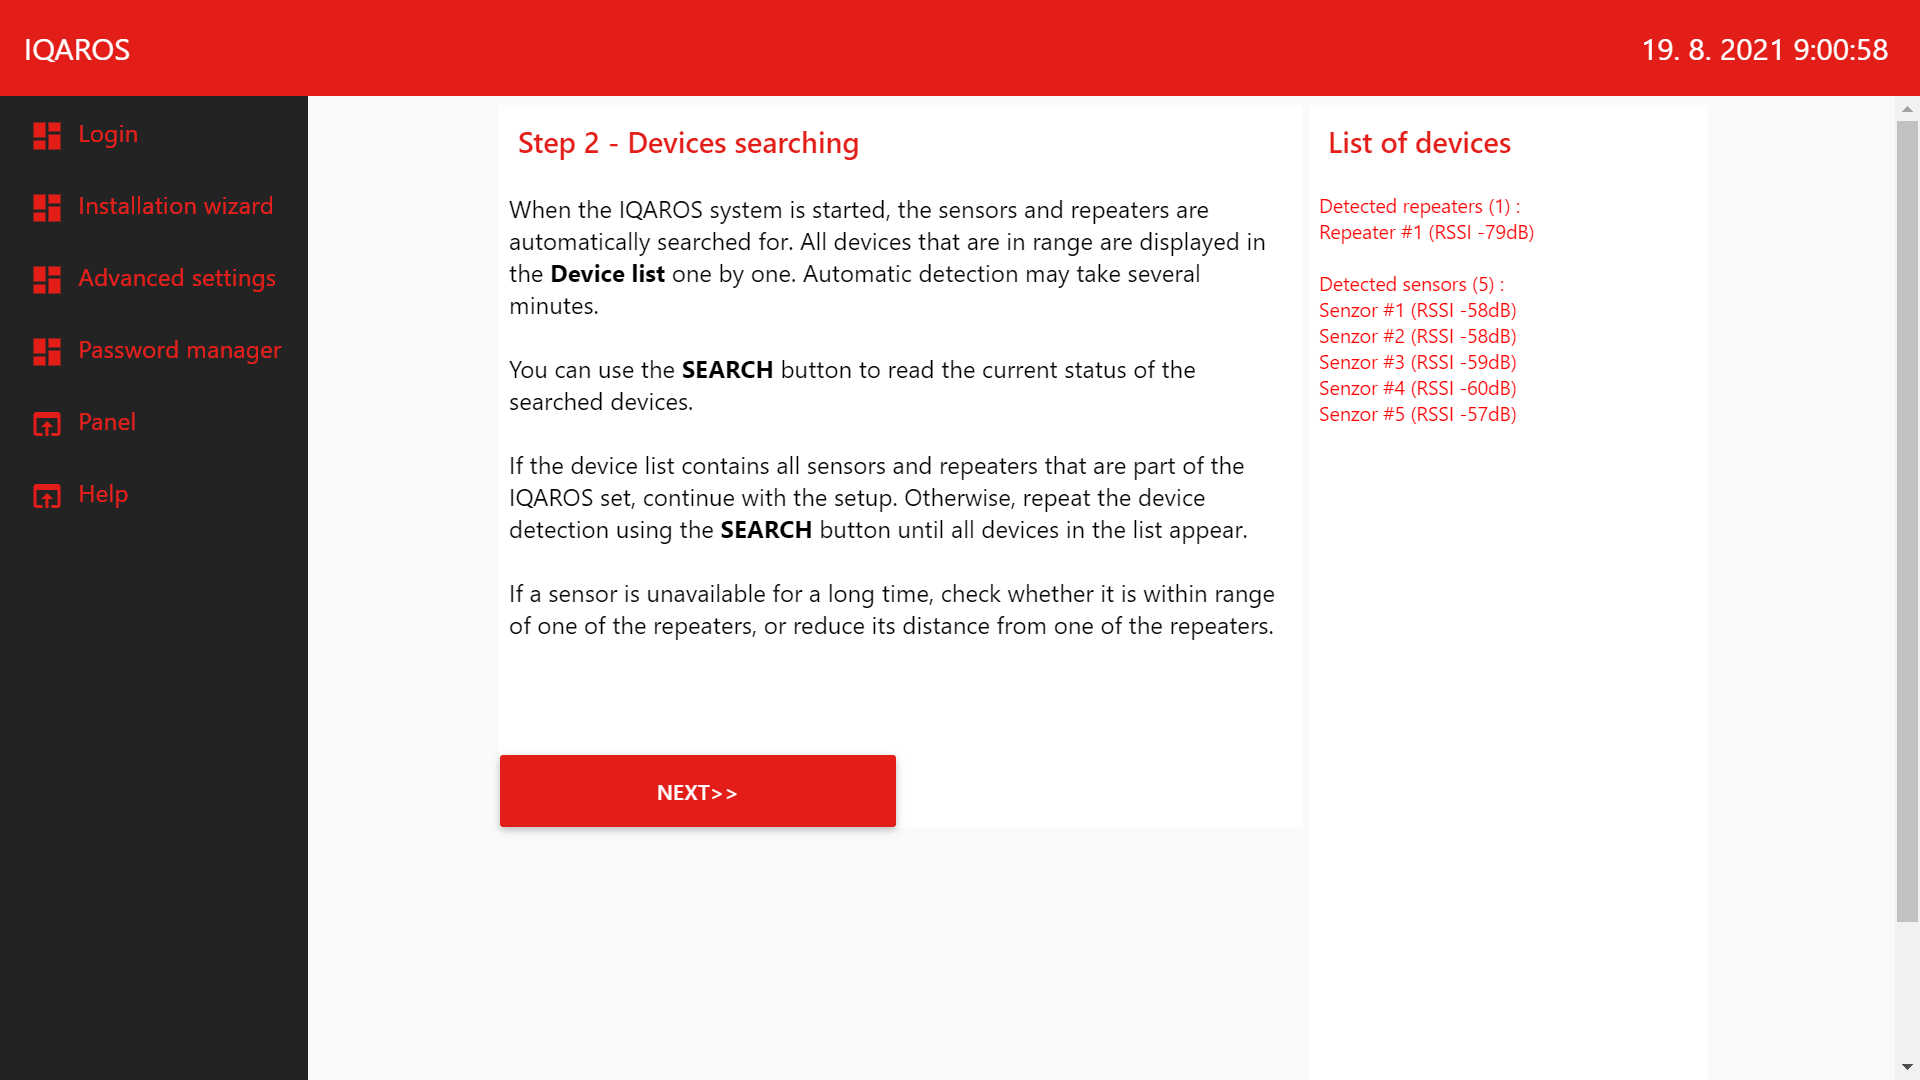
  • Sensors and repeaters are automatically detected when the IQAROS system is started. Device detection may take several minutes.
  • If not all devices are found, it is possible to repeat the detection (using the Search button) or change the placement of sensors and repeaters in the building to ensure the necessary ranges of the wireless signal in the environment.
  • If a sensor is unavailable permanently, check if it is within range of one of the repeaters, or reduce its distance from one of the repeaters.

System setup

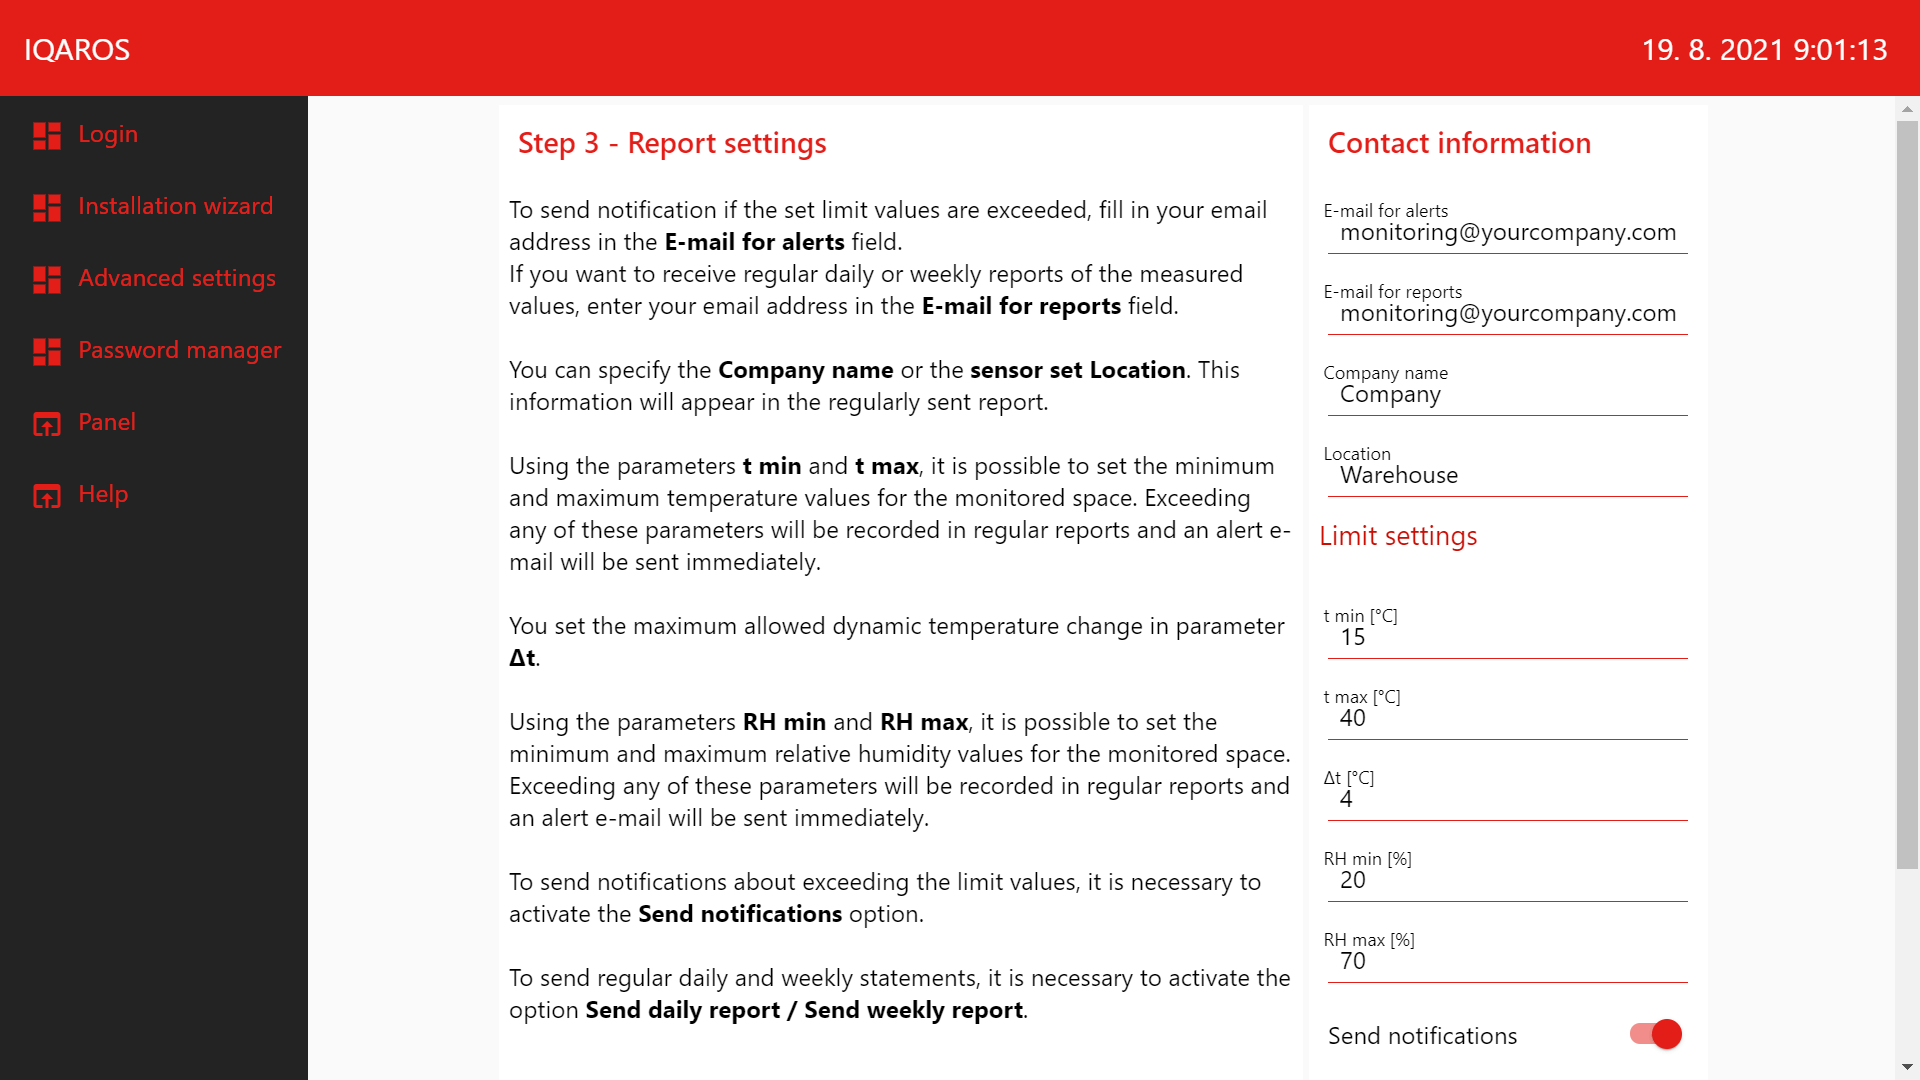
  • In the Report settings section, you can set up an e-mail address in the E-mail field for sending regular daily or weekly reports of measured values. The same address will be used for sending alerts in case of exceeding the limit values.
  • You can specify the Company name or the sensor set Location. This information will appear in the regularly sent report.
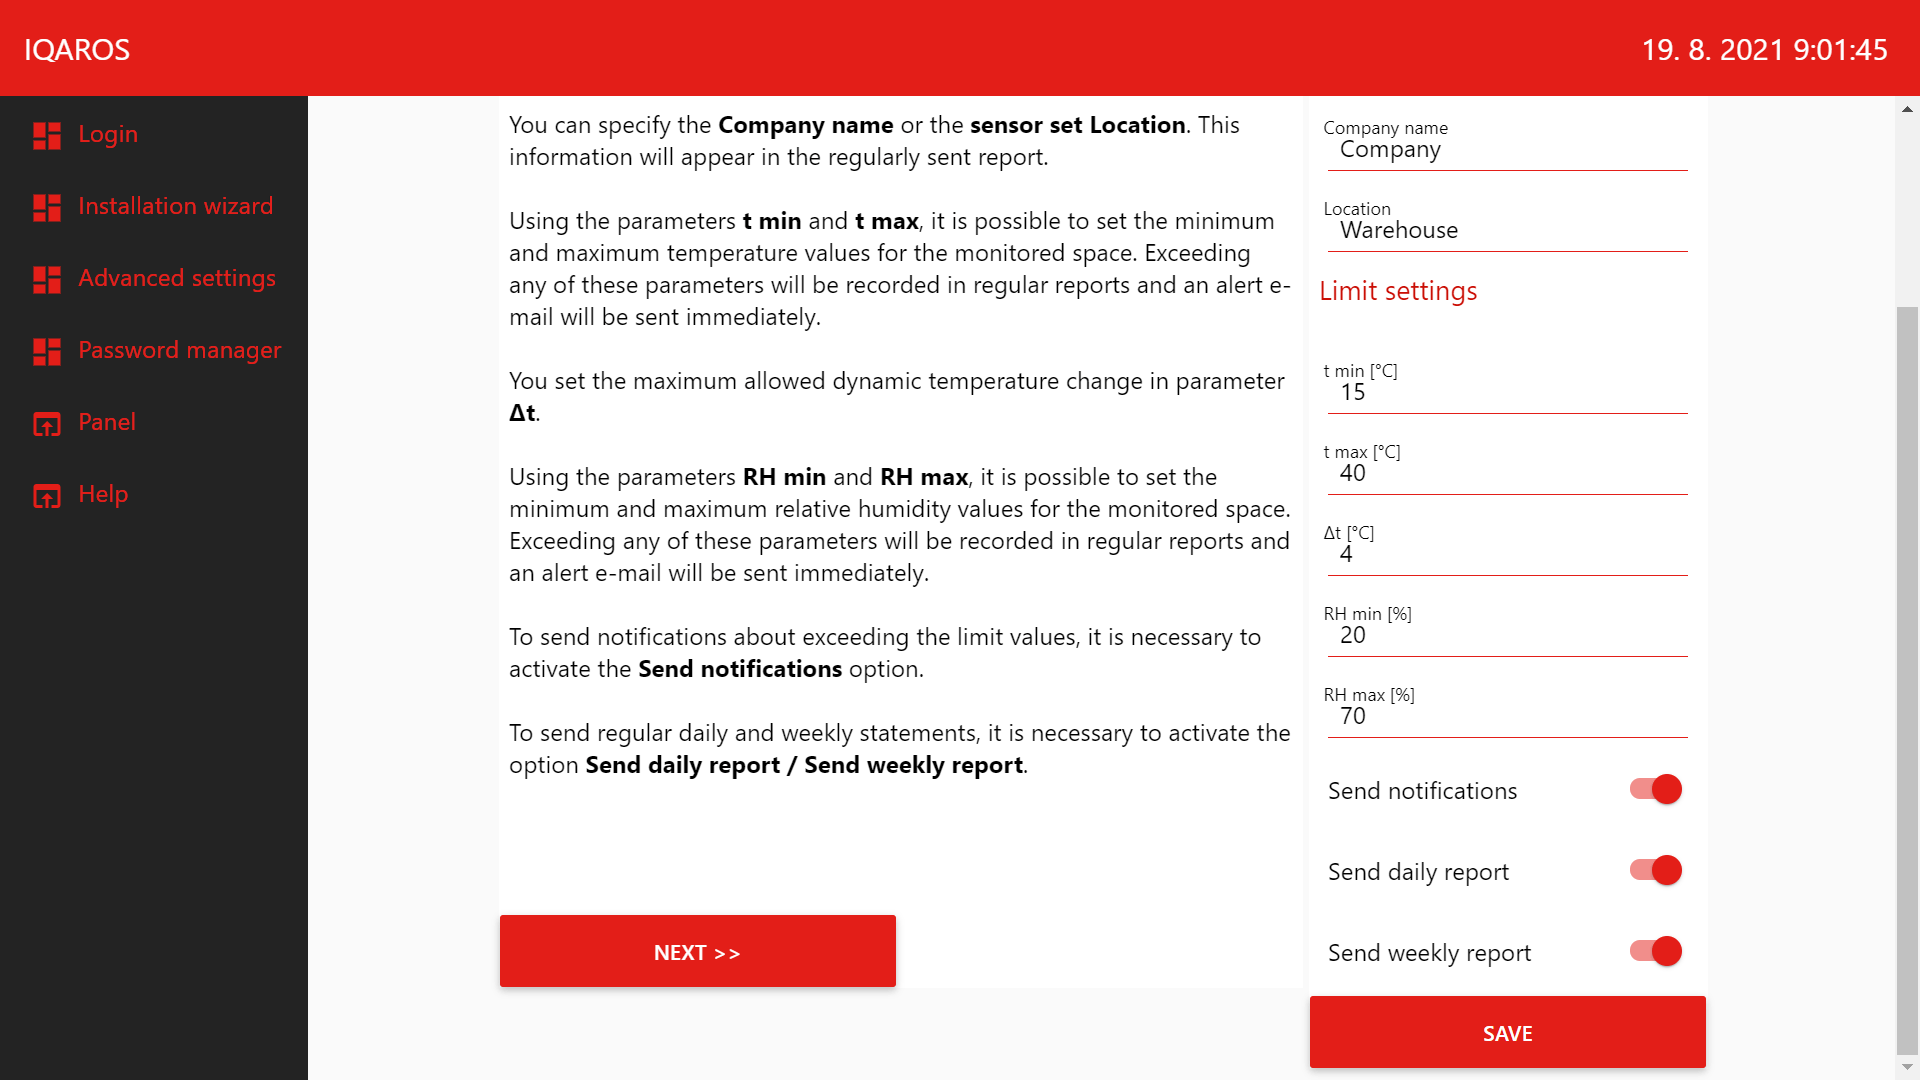
  • Using the parameters t min and t max, it is possible to set the minimum and maximum temperature values for the monitored space. Exceeding any of these parameters will be recorded in regular reports and an alert e-mail will be sent immediately.
  • You set the maximum allowed dynamic temperature change in parameter Δt.
  • Using the parameters RH min and RH max, it is possible to set the minimum and maximum relative humidity values for the monitored space. Exceeding any of these parameters will be recorded in regular reports and an alert e-mail will be sent immediately.
  • To send notifications about exceeding the limit values, it is necessary to activate the Send notifications option.
  • To send regular daily and weekly statements, it is necessary to activate the option Send daily report / Send weekly report.
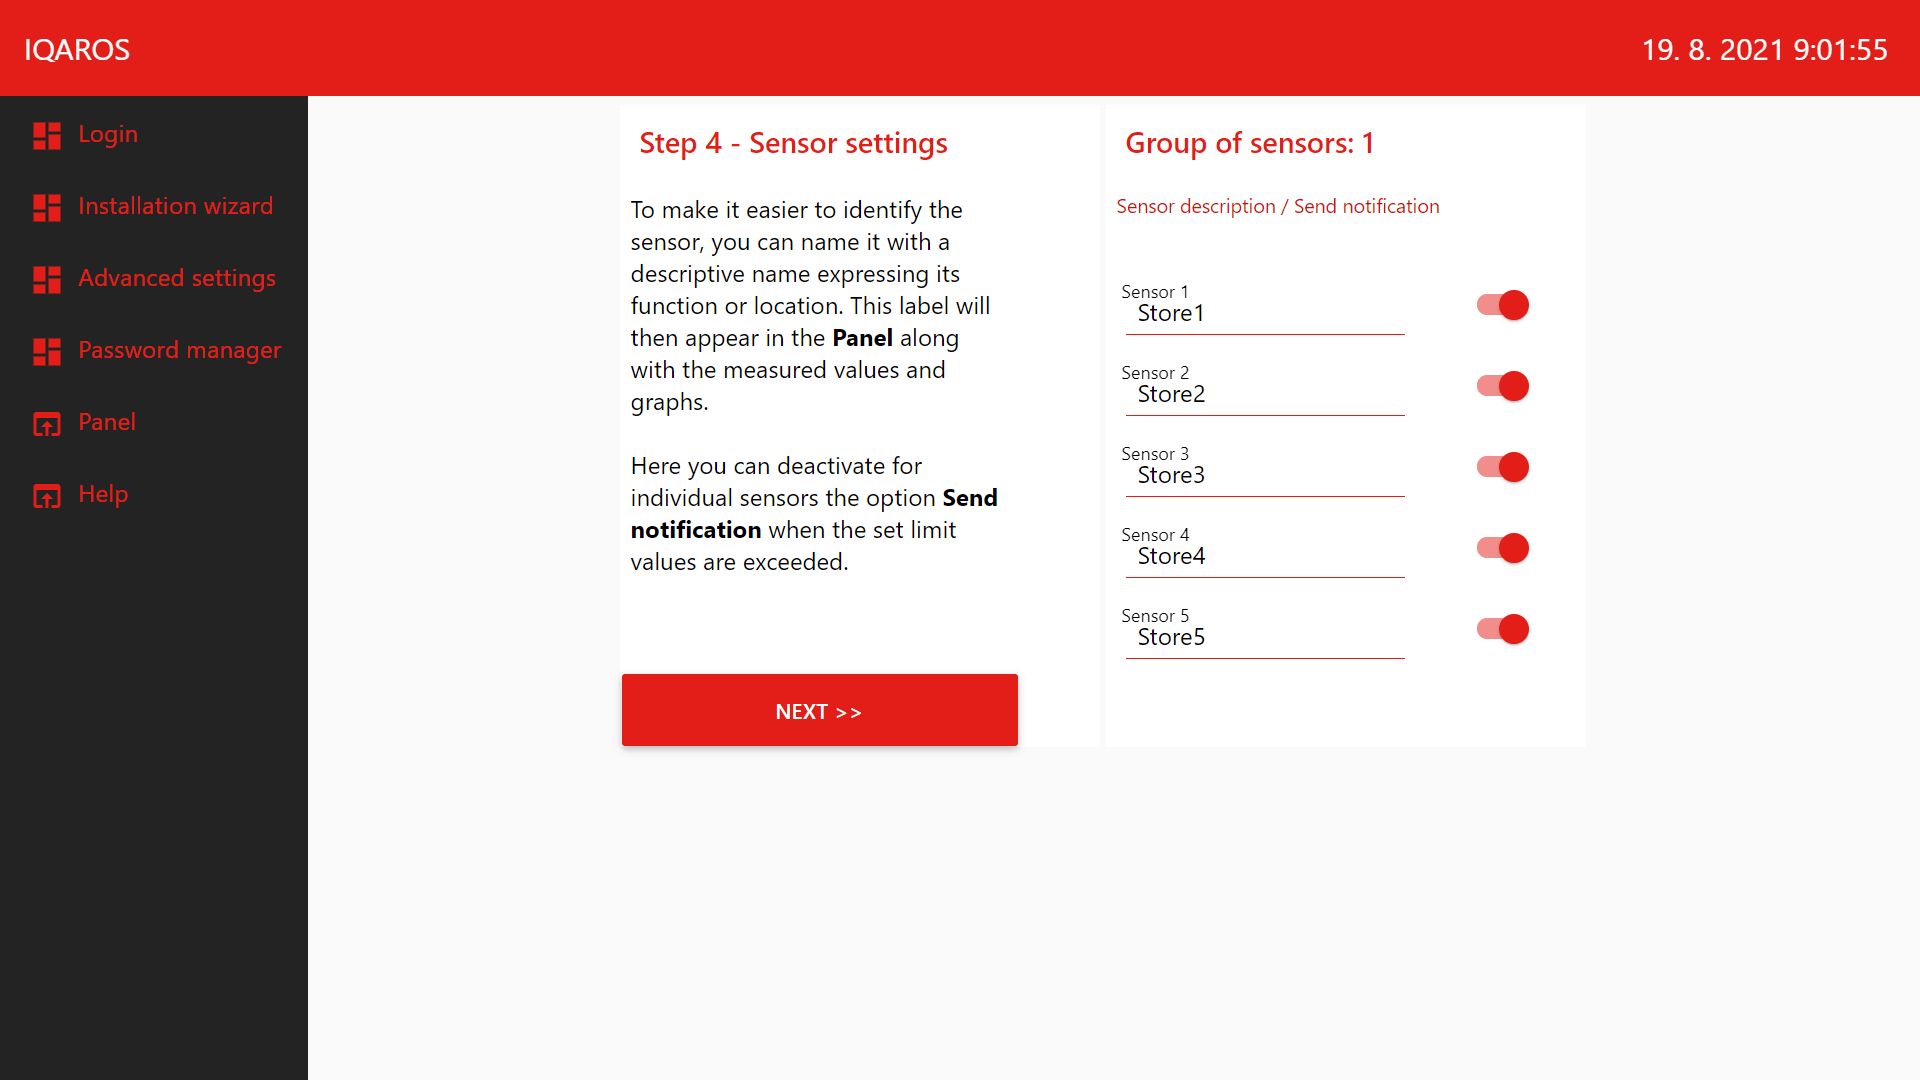
  • To make it easier to identify the sensor in the Sensor settings section, you can name it with a descriptive name expressing its function or location. This label will then appear in the Panel along with the measured values and graphs.
  • Here you can deactivate for individual sensors the option Send notification when the set limit values are exceeded.
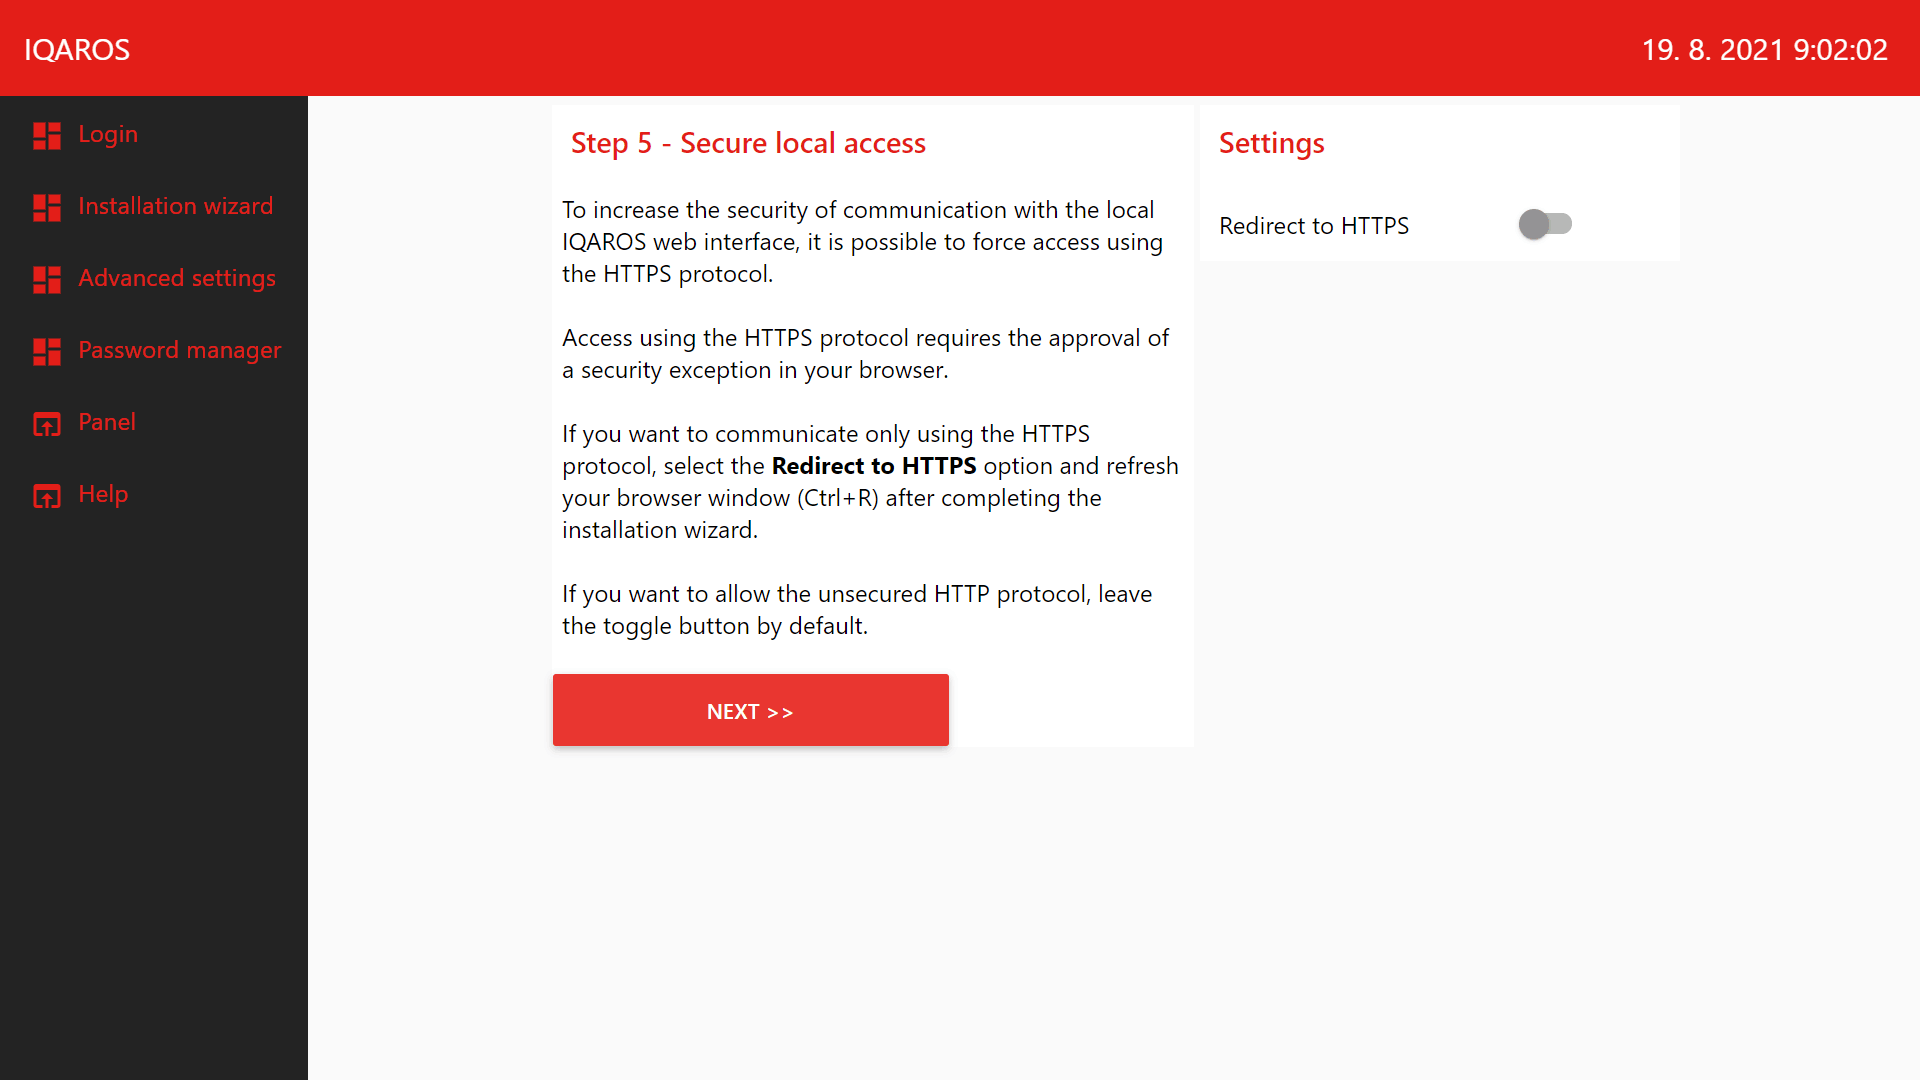
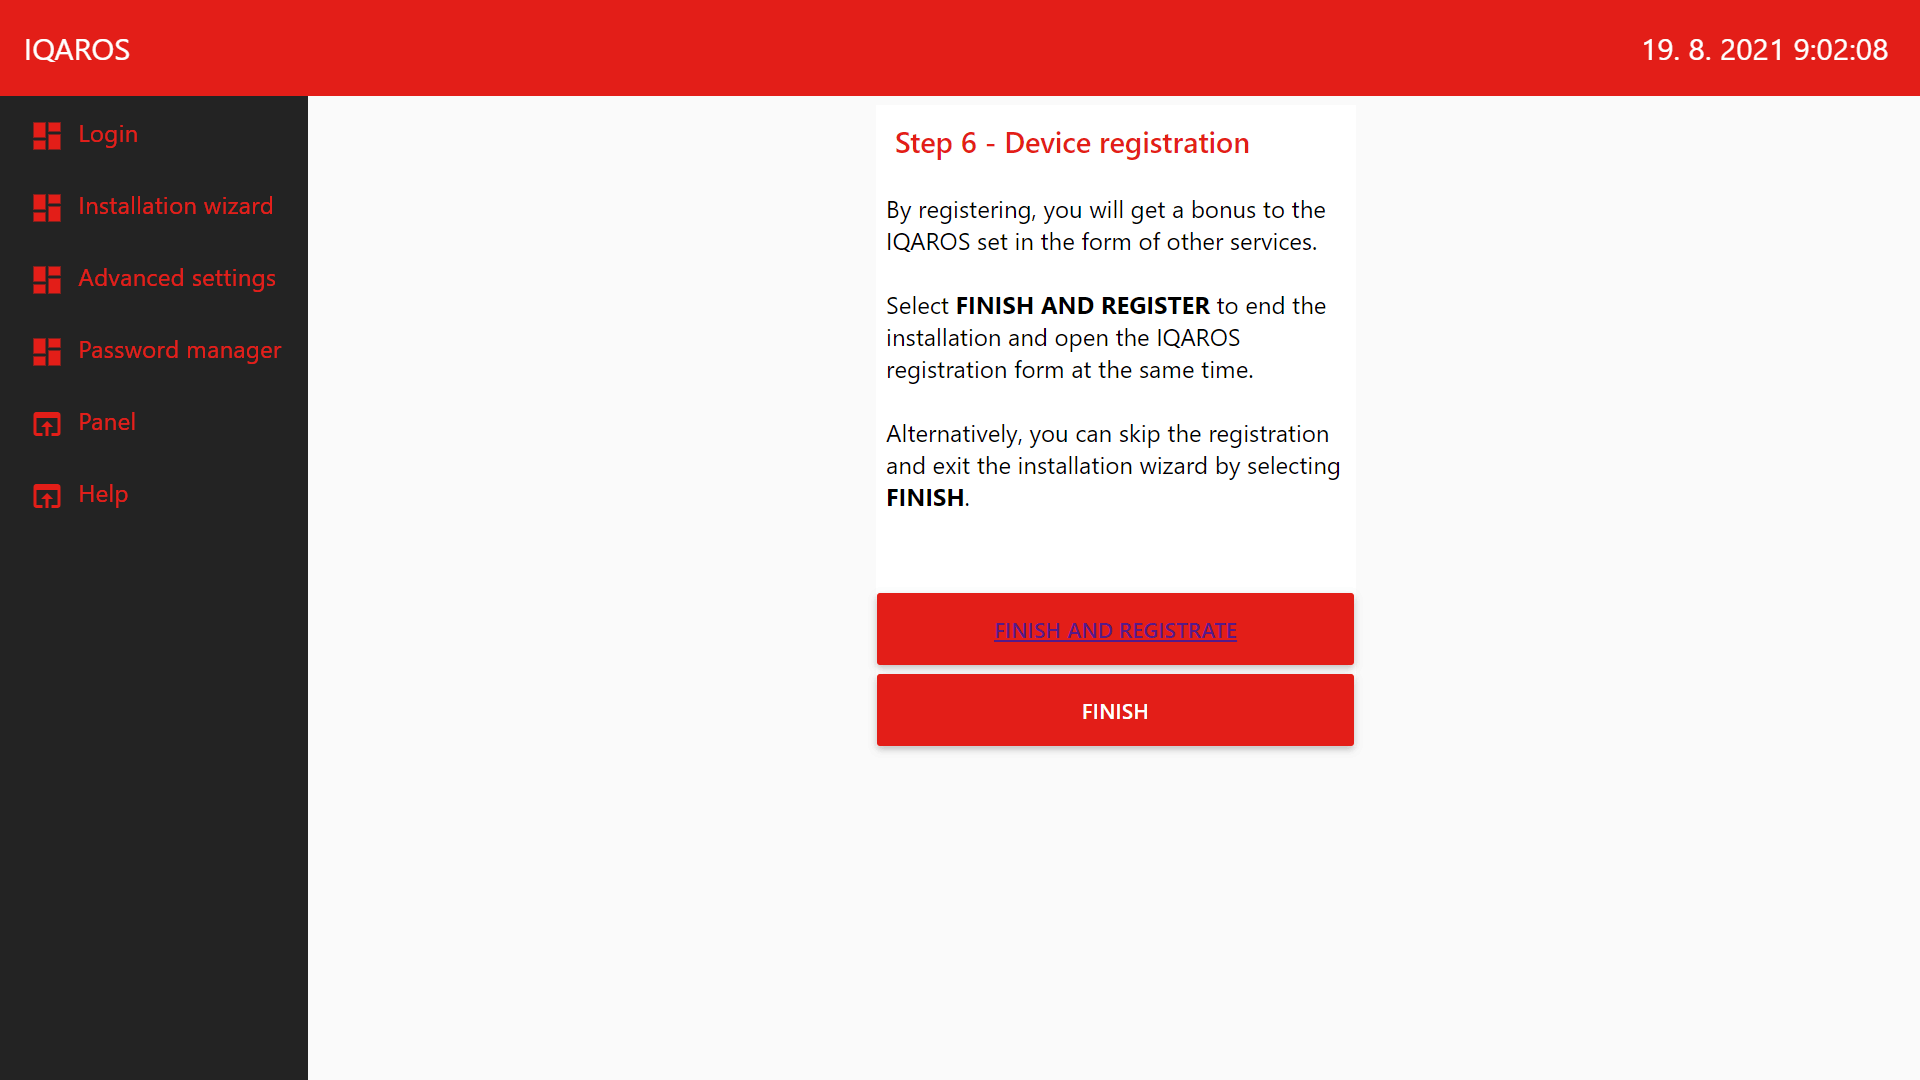
  • In the next steps, you can set up local secure access and register the set. Clicking the Finish button closes the initial setup wizard and the system switches to the Panel view, where visualization of the measured values is available.
  • See the news in installation and settings that have occurred in the new version (since June 2022). 

Data visualization

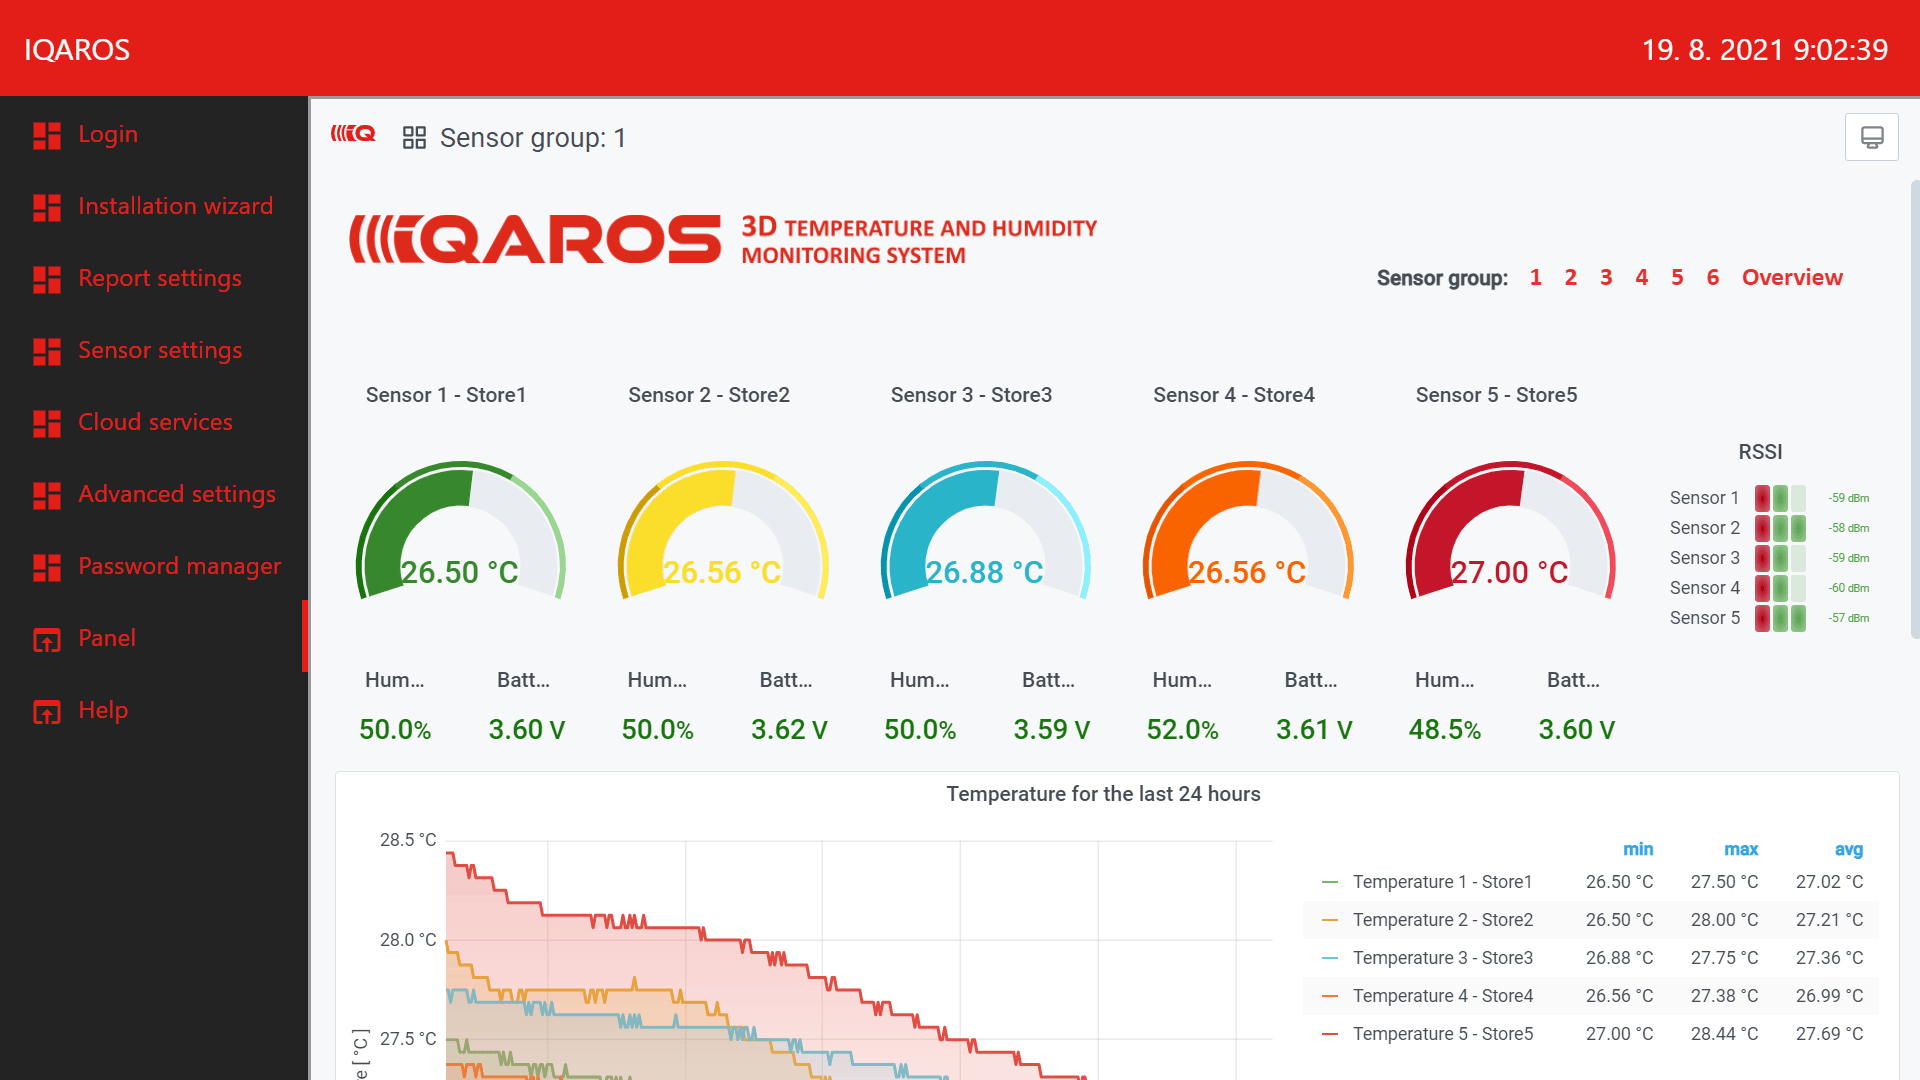
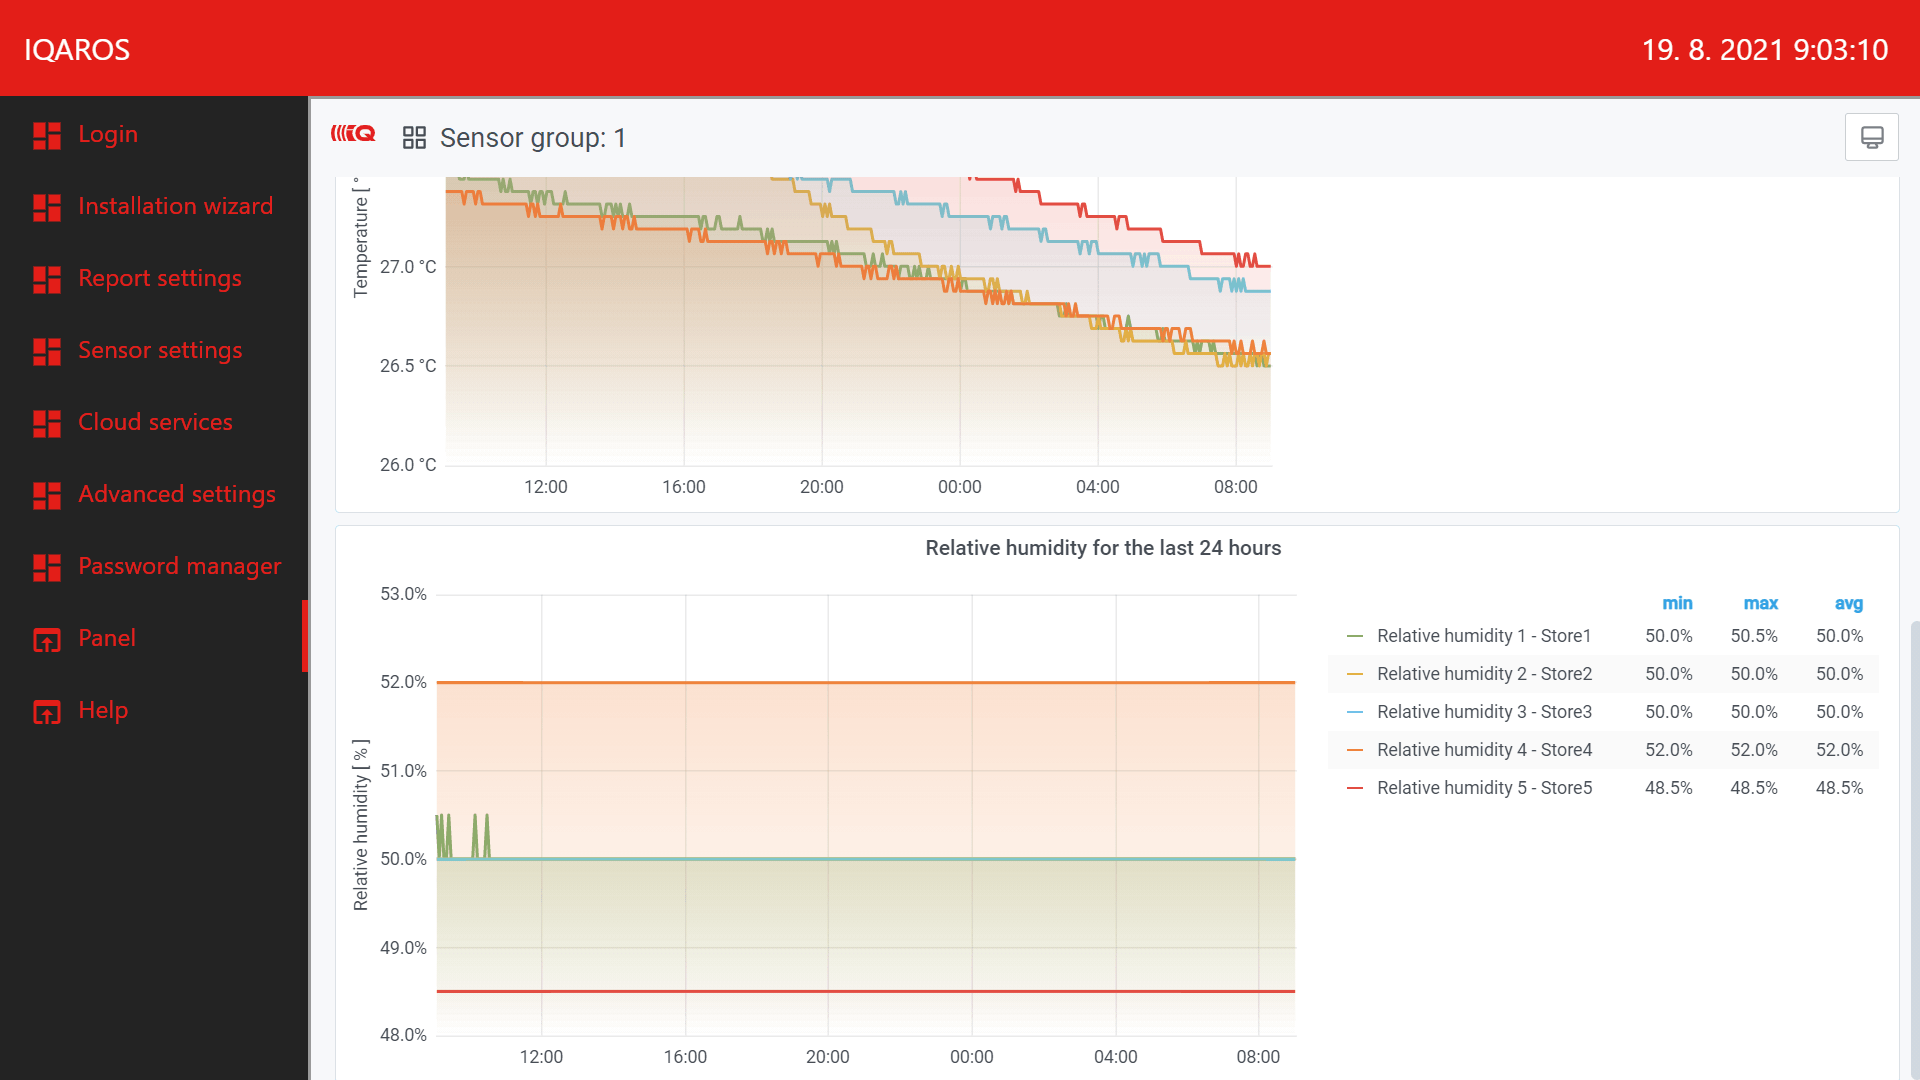
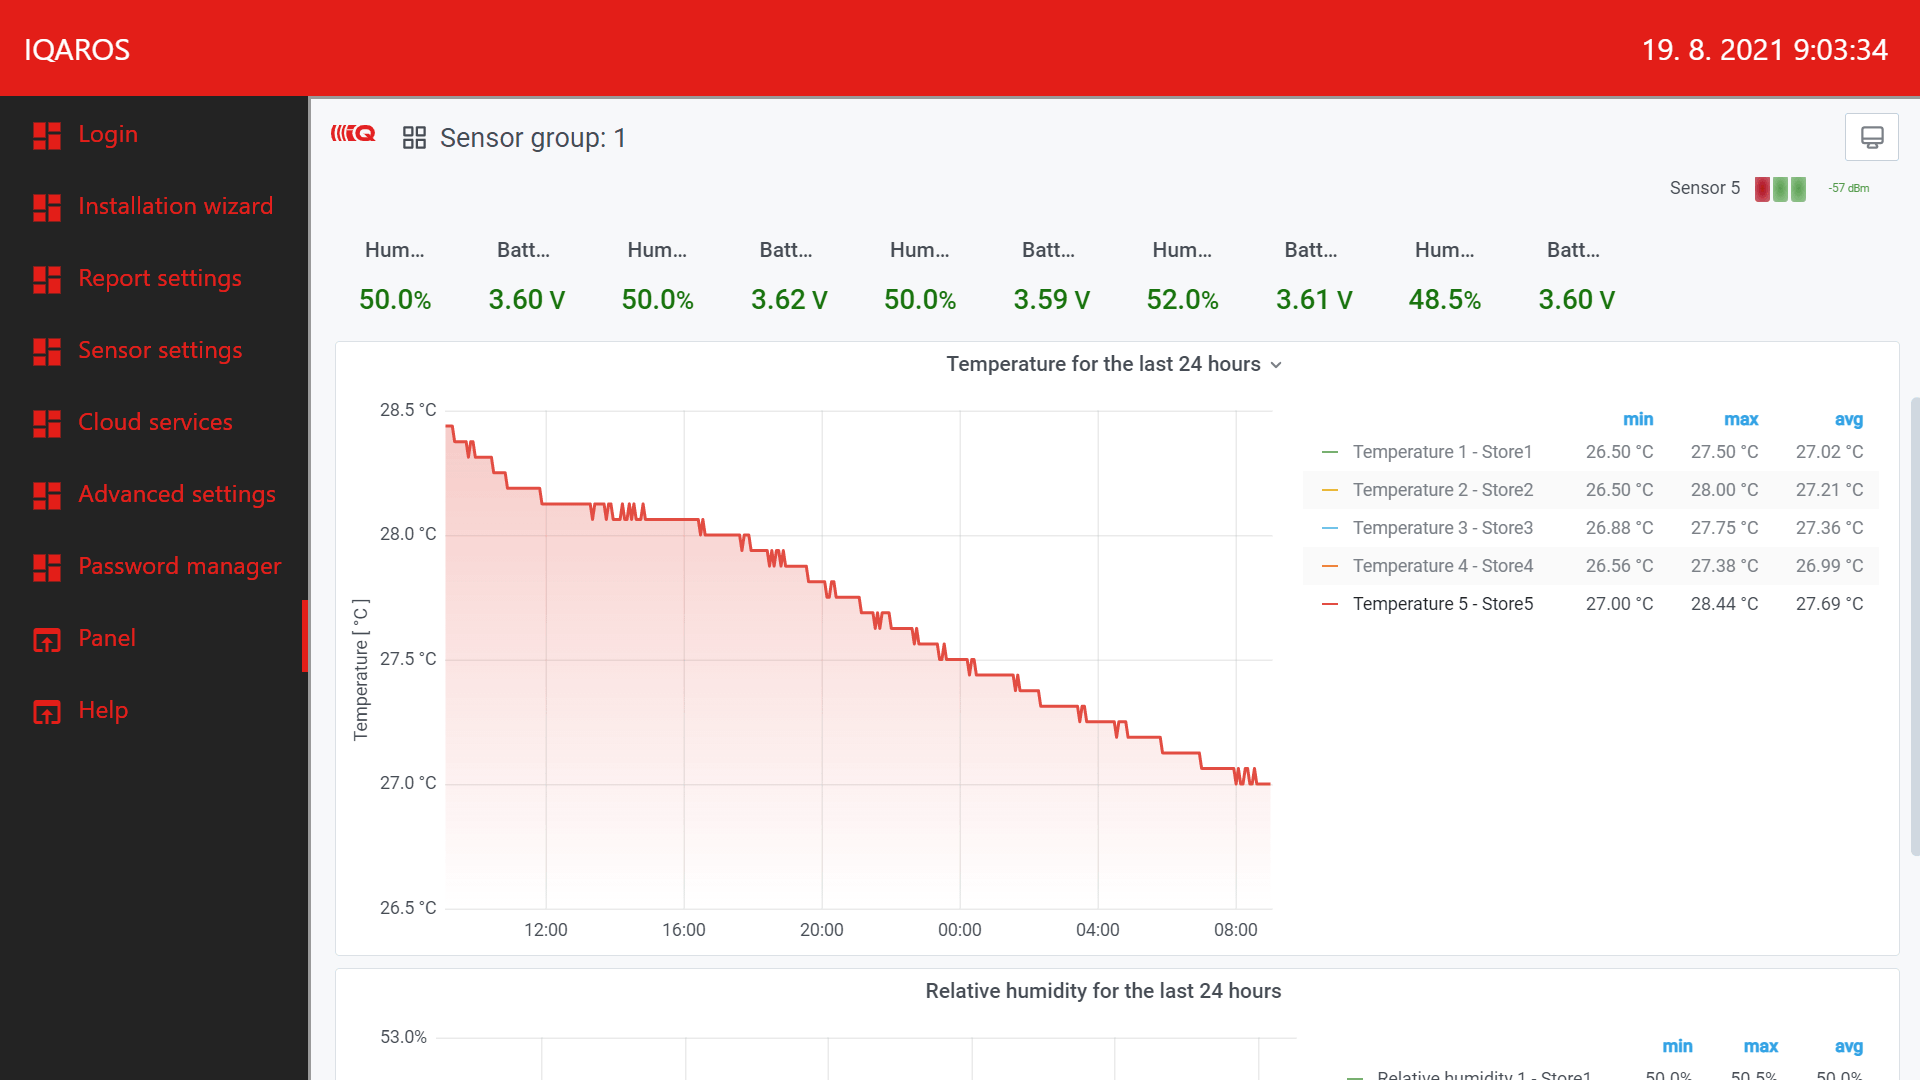
  • You can view the measured values in the Panel section.
  • In the upper right corner, you will find numbers representing individual groups of five sensors. You can switch between five sensors for which temperature and humidity graphs are created.
  • Click on the name of the selected sensor next to the graph to display only its graph. Click the mouse again to display a graph of all sensors in the group.
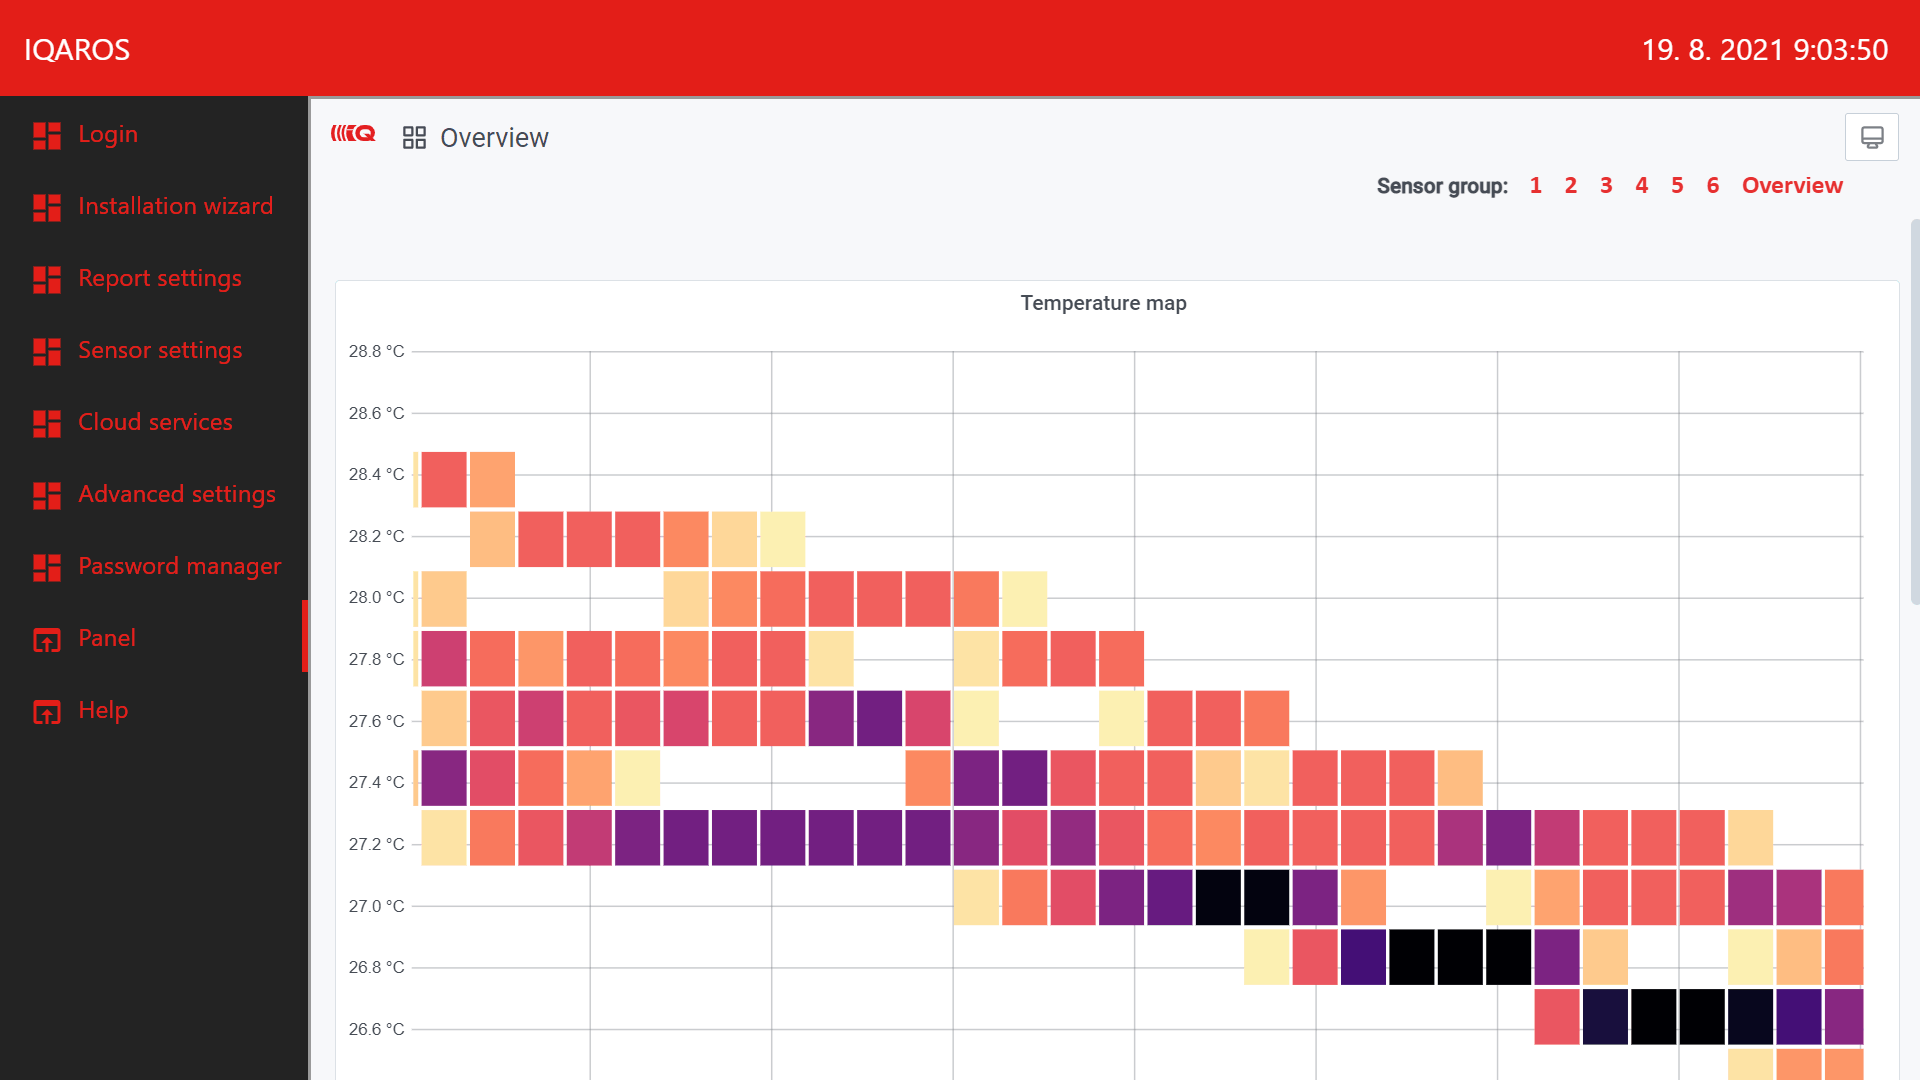
  • Click on Overview to display a summary display of measured temperatures and humidity from all sensors in the form of a histogram. Each rectangle in the histogram is defined by a time period during which the number of all measurements from all sensors in a given temperature or humidity range is recorded. The range and number of measurements are displayed when the mouse is moving over. The darker the color, the more measurements in a given time period met the given temperature or humidity range.
  • In the left menu, you will find links for setting parameters for reports and sensors, you can register your set and get bonus services (help with initial setup, cloud services), or run the initial wizard manually.

Notice

If the time is not synchronized with the NTP server after a power failure of the IQUBE gateway (eg the gateway will not be connected to the Internet) within two minutes after being switched on again, email alerts or data in the graphs may be displayed with incorrect time information.

This can be prevented by backing up the gateway with a UPS.

Data may be inconsistent even if you turn off time synchronization and manually set an invalid time.

Follow us!

About company

MICRORISC s.r.o.
Průmyslová 1275
506 01  Jičín, Czech Rep.


Email: iqaros@iqaros.cz   
Phone: +420 493 538 125
GPS: 50.4279447N, 15.3696769E


ID: 25 92 16 81
VAT: CZ 25 92 16 81
www.microrisc.com